
If you’ve ever wished that your chocolate milk could taste even more magical and just a little bit healthier, this Homemade Nesquik Recipe is going to become your new best friend. With everyday pantry staples, you can whip up a rich and creamy chocolate milk mix that dissolves perfectly in any milk you choose—no preservatives or artificial ingredients necessary. This easy recipe lets you customize sweetness and enjoy that nostalgic chocolatey goodness anytime you want, whether it’s for a cozy night in or a quick mid-day treat.
Ingredients You’ll Need
Gathering simple but perfectly balanced ingredients is key to making the best Homemade Nesquik Recipe possible. Each element plays a crucial role in achieving that smooth texture and deep, chocolaty flavor that makes this mix so addictive.
- Unsweetened cocoa powder: The star of the show delivering rich chocolate flavor without any added sugar.
- Powdered sugar: Provides just the right level of sweetness and helps the mix dissolve smoothly in milk.
- Powdered milk: Adds creaminess and body to the mix, simulating that authentic chocolate milk taste.
- Salt: A tiny pinch enhances the chocolate flavor, balancing sweetness perfectly.
- Cornstarch (optional): Helps keep the powder from clumping, ensuring every spoonful blends beautifully.
How to Make Homemade Nesquik Recipe
Step 1: Sifting and Combining
Start by sifting together the unsweetened cocoa powder, powdered sugar, powdered milk, and salt in a large bowl. Sifting is key here because it gets rid of lumps and guarantees that your mix will be smooth and easy to stir into milk.
Step 2: Adding the Cornstarch
If you want to prevent clumping, gently sprinkle in the cornstarch and whisk everything together until you have a perfectly blended powder. The cornstarch is especially handy if you plan to store the mix for a while.
Step 3: Storing Your Mix
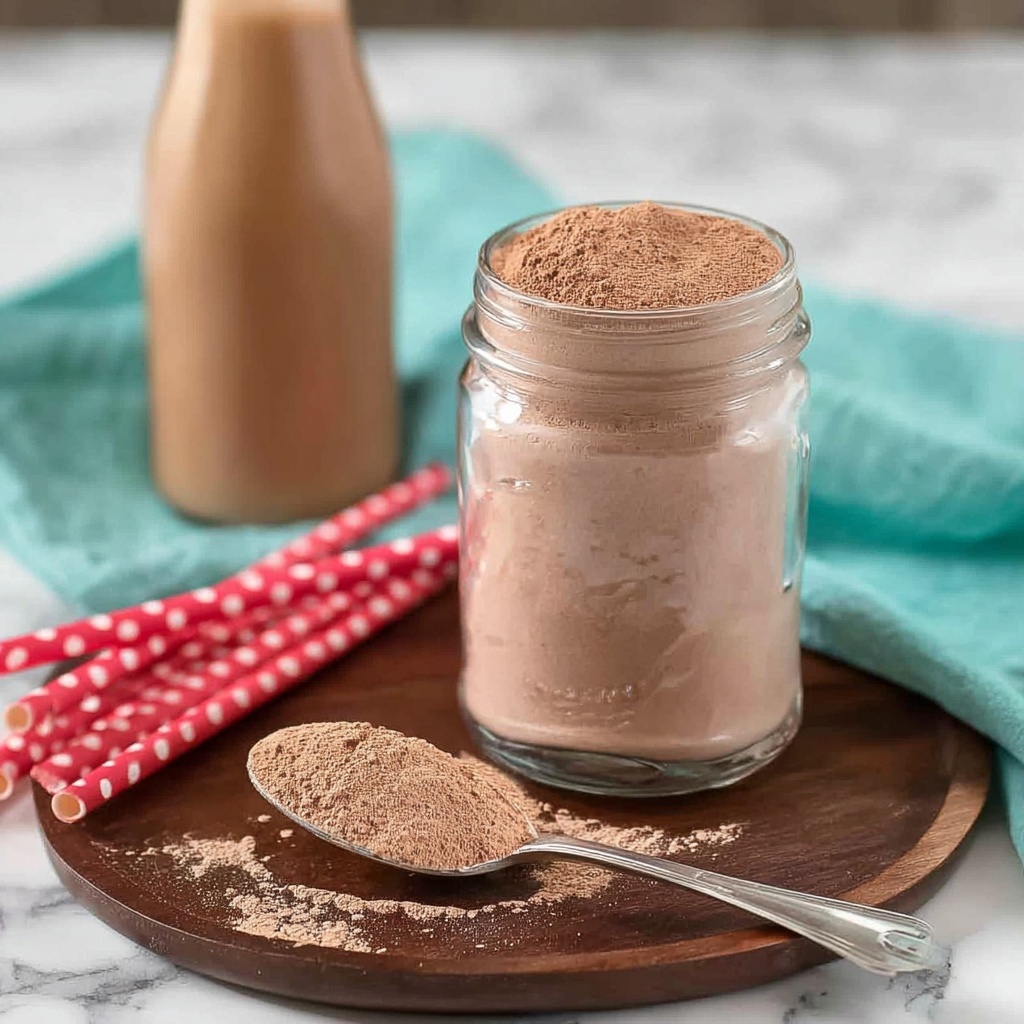
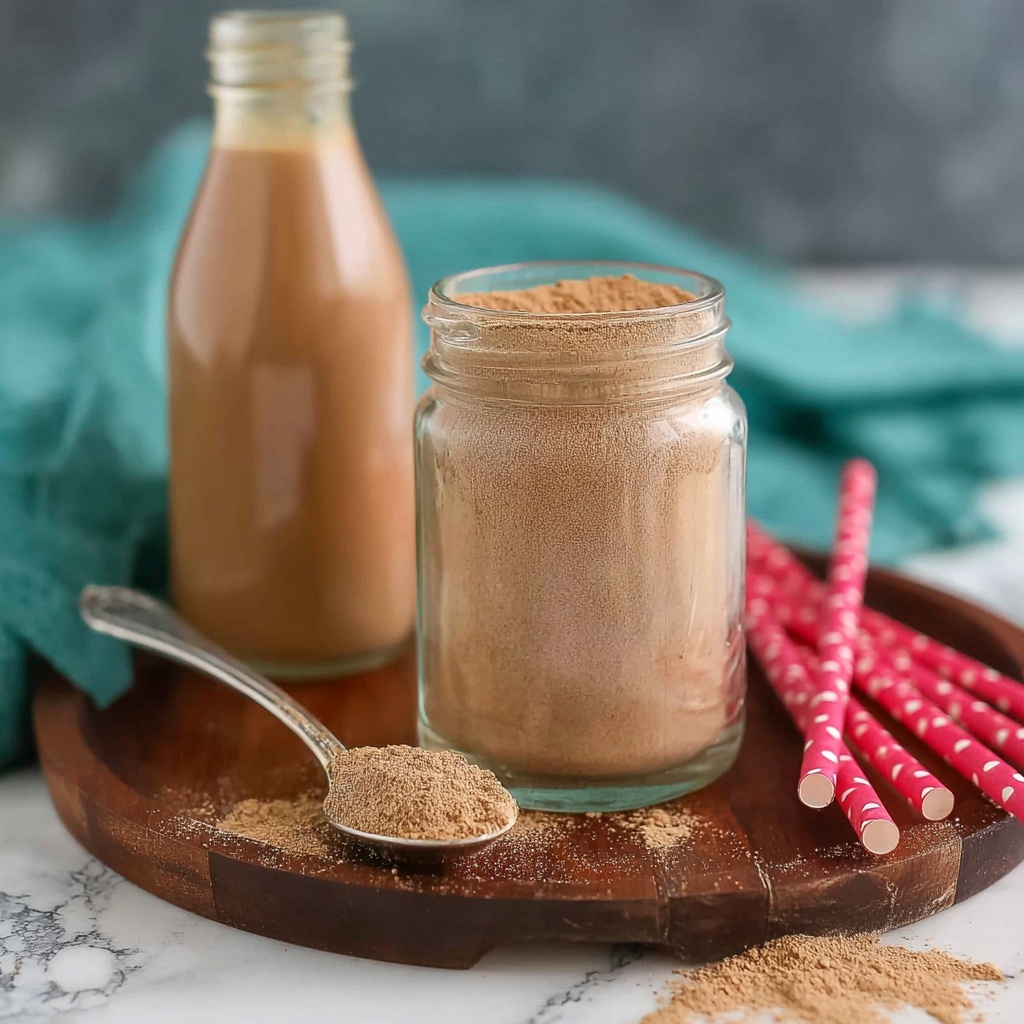
Transfer your Homemade Nesquik Recipe into an airtight container or jar. This keeps the powder fresh and ready to go whenever you’re craving that chocolaty drink.
Step 4: Making Chocolate Milk
To enjoy, simply stir 2 to 3 tablespoons of your homemade mix into 1 cup of cold or warm milk until fully dissolved. Adjust the amount of mix to your taste, and you’ve got a delicious glass of homemade chocolate milk in seconds.
How to Serve Homemade Nesquik Recipe
Garnishes
Give your chocolate milk an extra touch of love by topping it with whipped cream, a sprinkle of cocoa powder, or even mini chocolate chips. These little additions make the drink feel special, especially for kids or guests.
Side Dishes
Chocolate milk pairs beautifully with classic favorites like freshly baked cookies, buttery toast, or even a simple bowl of granola. These combos create a delightful snack or breakfast experience.
Creative Ways to Present
Turn your Homemade Nesquik Recipe into a fun centerpiece by serving it in mason jars with striped straws or layering it over ice cream for an irresistible chocolate milk float. You can also mix it into smoothies for a chocolatey boost or drizzle it over pancakes for a unique syrup alternative.
Make Ahead and Storage
Storing Leftovers
This Homemade Nesquik Recipe mix keeps wonderfully in an airtight container at room temperature for several weeks. Just make sure it’s sealed tightly and stored in a cool, dry place to maintain freshness and prevent clumping.
Freezing
Freezing is not necessary for this mix and could cause moisture issues when thawed. It’s best to keep it pantry-fresh and use within a reasonable timeframe for the best flavor and texture.
Reheating
Since this mix is designed to dissolve in milk, reheating is as simple as stirring it into warmed milk if you prefer a cozy, hot chocolate version. Just heat your milk gently and mix in the Homemade Nesquik Recipe for instant comfort.
FAQs
Can I make the Homemade Nesquik Recipe dairy-free?
Absolutely! Simply omit the powdered milk from the mix and stir it into your favorite plant-based milk like almond, oat, or soy for a delicious dairy-free chocolate milk.
How long does the powder last?
When stored in an airtight container away from heat and moisture, your Homemade Nesquik Recipe will stay fresh and flavorful for up to 4 weeks.
Can I adjust the sweetness?
Yes! Feel free to tweak the amount of powdered sugar to suit your taste—more for sweeter chocolate milk or less if you prefer it more bitter and intense.
Is the cornstarch necessary?
Cornstarch is optional but highly recommended if you want your mix to stay free-flowing and lump-free over time, especially in humid climates.
Can I use this mix in recipes other than chocolate milk?
Definitely. This Homemade Nesquik Recipe is versatile and can enhance smoothies, baked goods, oatmeal, or even be sprinkled over ice cream for a chocolate twist.
Final Thoughts
There’s something truly special about making your own Homemade Nesquik Recipe—it’s simple, wholesome, and bursts with the rich chocolate flavor you love but without any unnecessary additives. Whether you’re treating yourself after a long day or looking for a fun and easy beverage to share with kids, this recipe is an absolute winner. Give it a try and see just how much better chocolate milk can taste when it’s crafted with care right in your own kitchen.
Print
Homemade Nesquik Recipe
- Prep Time: 5 minutes
- Cook Time: 0 minutes
- Total Time: 5 minutes
- Yield: About 20 servings
- Category: Drinks
- Method: No-Cook
- Cuisine: American
- Diet: Vegetarian
Description
This Homemade Nesquik recipe allows you to create a delicious, sweetened cocoa powder mix at home, perfect for making quick and tasty chocolate milk. Made with simple pantry staples like unsweetened cocoa powder, powdered sugar, and powdered milk, this mix provides a convenient and customizable alternative to store-bought versions. It’s easy to prepare, requires no cooking, and can be used in drinks, smoothies, or as a topping for desserts.
Ingredients
Ingredients
- 1 cup unsweetened cocoa powder
- 1 ½ cups powdered sugar
- 1 cup powdered milk
- ½ teaspoon salt
- 1 teaspoon cornstarch (optional, for anti-caking)
Instructions
- Mix dry ingredients: In a large mixing bowl, sift together the unsweetened cocoa powder, powdered sugar, powdered milk, and salt to remove any lumps and ensure an even mixture.
- Add cornstarch: If using, stir in the cornstarch to help prevent clumping and keep the mix free-flowing.
- Combine thoroughly: Whisk all the ingredients together until fully combined and uniformly mixed.
- Store the mix: Transfer the homemade Nesquik powder into an airtight container or jar to keep it fresh and dry.
- Make chocolate milk: To prepare chocolate milk, mix 2 to 3 tablespoons of the Nesquik mix into 1 cup of cold or warm milk and stir until completely dissolved.
Notes
- You can adjust the amount of sugar to taste if you prefer a sweeter or less sweet chocolate milk.
- For a dairy-free version, omit the powdered milk and mix the cocoa and sugar directly with your favorite plant-based milk.
- This mix is versatile and works well not only in milk but also in smoothies or as a topping for ice cream.


