If you have a soft spot for classic, refreshing desserts that bring a touch of nostalgia to your table, you are going to adore this No-Bake Woolworth Icebox Cheesecake Recipe. It’s the kind of delight that’s light, tangy, and creamy all at once, coming together with simple ingredients you probably already have on hand. This vintage treasure is as easy to whip up as it is to fall in love with, offering a lemony goodness that’s perfect for any occasion when you want something bright and downright irresistible without turning on the oven.
Ingredients You’ll Need
Gathering these straightforward ingredients is the first step to making your No-Bake Woolworth Icebox Cheesecake Recipe shine. Each one plays a crucial role—whether it’s building that buttery crust, creating a luscious filling, or adding a zesty lemon twist that wakes up your taste buds.
- Lemon Jell-O (3 oz package): Adds a refreshing citrus flavor and helps set the cheesecake filling without baking.
- Boiling water (1 cup): Necessary to dissolve the Jell-O perfectly for a smooth blend.
- Cream cheese (8 oz, softened): Provides the rich and creamy base that makes this cheesecake dreamy.
- Granulated sugar (1 cup): Sweetens the filling to balance the tart lemon notes.
- Vanilla extract (1 teaspoon): Adds depth and enhances all the flavors beautifully.
- Evaporated milk (12 oz, chilled): Whipped to stiff peaks, it lightens the filling for that signature airy texture.
- Graham cracker crumbs (1 ½ cups): Form the buttery crust that’s crisp yet tender.
- Unsalted butter (5 tablespoons, melted): Binds the crust crumbs and adds richness without overpowering.
How to Make No-Bake Woolworth Icebox Cheesecake Recipe
Step 1: Dissolve and Cool the Jell-O
Start by dissolving the lemon Jell-O in one cup of boiling water. This step is essential for ensuring the lemon flavor infuses the entire cheesecake filling while helping it set perfectly without heat. Let it cool to room temperature—you don’t want to scramble the cream cheese in the next step!
Step 2: Cream Cheese, Sugar, and Vanilla
In a large bowl, beat your softened cream cheese together with the granulated sugar and vanilla extract until you get a smooth and creamy mixture. This process lays down the luscious foundation for your cheesecake, creating that irresistible velvety texture. Make sure there are no lumps for the best smoothness.
Step 3: Combine Jell-O with Cream Cheese Mixture
Once the lemon Jell-O has cooled, slowly pour it into your cream cheese mixture while stirring continuously. This gentle mixing step ensures the filling is perfectly uniform and nicely flavored without any curdling or rough patches.
Step 4: Whip the Evaporated Milk
Chill your mixing bowl and whip the cold evaporated milk on high speed until it forms stiff peaks. This whipped milk is the secret that makes the filling light, fluffy, and just a bit decadent. Gently fold the whipped milk into the cream cheese and Jell-O blend with a spatula, taking care to maintain that airy texture.
Step 5: Prepare the Graham Cracker Crust
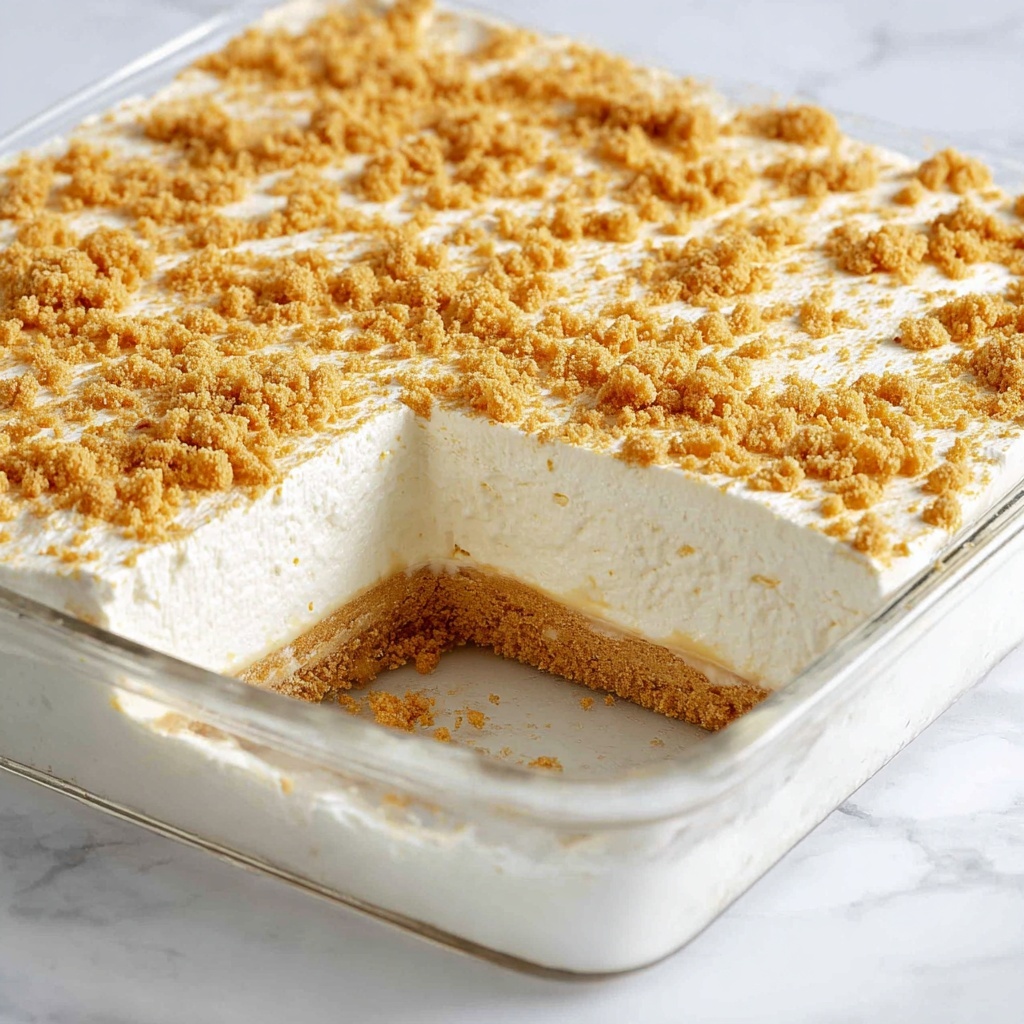
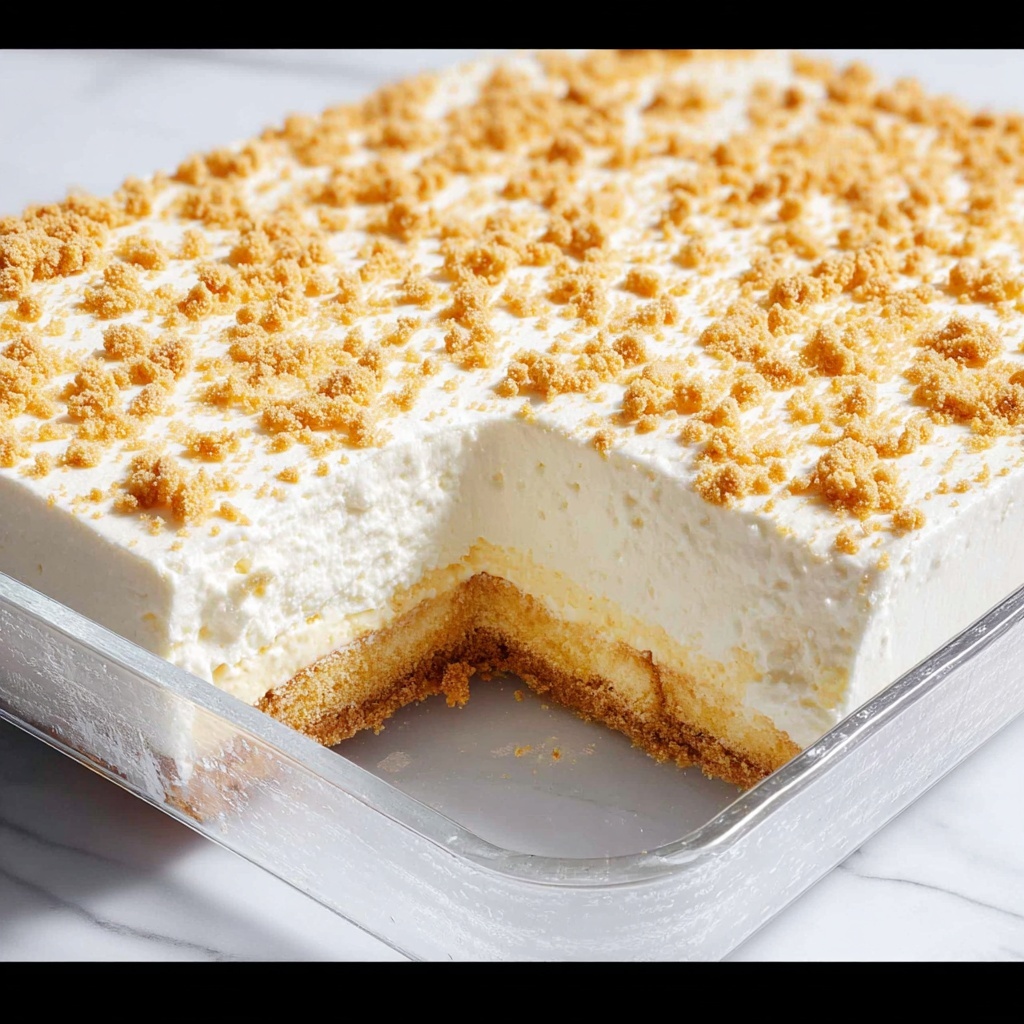
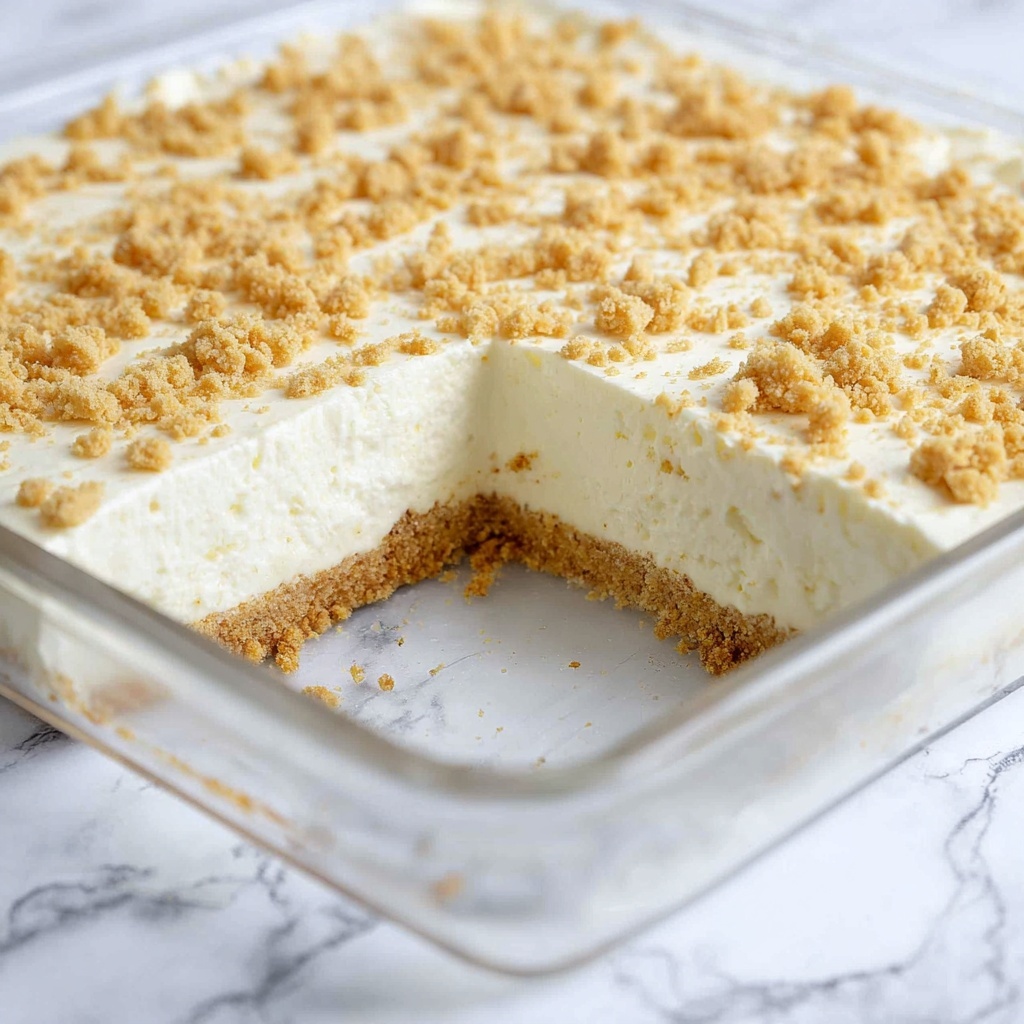
Mix the graham cracker crumbs with your melted butter until everything is evenly coated and crumbly. Press about two-thirds of this crumb mixture firmly and evenly into the bottom of a 9×13-inch pan to create the base of your cheesecake. This crust will provide just the right amount of crunch without overpowering the soft filling.
Step 6: Assemble and Chill
Pour the luscious cheesecake filling over your crust and smooth it out with a spatula. Sprinkle the remaining graham cracker crumbs evenly on top for a charming finish. Pop your creation into the refrigerator for at least 4 hours, or even better, overnight. The chilling time is when all the magic happens—the filling sets to the perfect creamy firmness you expect from a classic icebox cheesecake.
How to Serve No-Bake Woolworth Icebox Cheesecake Recipe
Garnishes
A sprinkle of fresh lemon zest or a few plump raspberries or blueberries on top can add a pop of color and a burst of fresh flavor that complements the tangy lemon in the cheesecake. Mint leaves also provide a lovely aromatic touch and visual appeal.
Side Dishes
This cheesecake pairs delightfully well with a dollop of freshly whipped cream or a scoop of vanilla bean ice cream for an indulgent treat. For a lighter accompaniment, a small fruit salad with citrus segments balances the richness beautifully.
Creative Ways to Present
Consider serving this cheesecake in small individual clear cups layered with fresh fruit for a modern twist on the vintage classic. Or, use mini tart pans to make adorable single-serving icebox cheesecakes—perfect for parties! You can also drizzle a berry coulis over the top for a gourmet finish.
Make Ahead and Storage
Storing Leftovers
Simply cover your leftover cheesecake tightly with plastic wrap or store it in an airtight container in the fridge. It keeps wonderfully for up to 5 days, allowing you to enjoy this treat slowly without losing its delicate texture or flavor.
Freezing
You can freeze slices of this cheesecake for up to one month. Make sure to wrap each slice well in plastic wrap and aluminum foil to prevent freezer burn. Thaw overnight in the refrigerator before serving to retain the best texture.
Reheating
This dessert is best enjoyed chilled. Therefore, reheating is not recommended as it will affect the creamy texture and may cause separation. Instead, just allow any frozen slices to thaw properly in the fridge and serve cold.
FAQs
Can I use another flavor of Jell-O for this recipe?
Absolutely! While lemon is classic and adds a bright tang, you can experiment with strawberry, orange, or even lime Jell-O to create fun, colorful variations of the No-Bake Woolworth Icebox Cheesecake Recipe.
Do I need to use evaporated milk, or can I substitute something else?
Evaporated milk, when whipped, adds a unique lightness and stability to the filling that’s hard to replicate. You could try heavy cream whipped to stiff peaks as an alternative, though the texture and taste will be slightly different.
Why does the recipe require the evaporated milk to be chilled?
Chilling the evaporated milk ensures it whips up properly to stiff peaks. If it’s too warm, it won’t hold the texture needed, and your cheesecake filling could end up dense instead of light and fluffy.
Is this recipe suitable for vegetarians?
Yes, this No-Bake Woolworth Icebox Cheesecake Recipe is vegetarian-friendly as it contains no meat products. Just be sure to check your Jell-O’s ingredients if vegan options are needed, as many gelatin products are animal-based.
Can I make this cheesecake without a refrigerator?
Since the cheesecake requires several hours of chilling to set properly, a refrigerator or a cool icebox is essential. Room temperature alone won’t give you that firm, sliceable finish.
Final Thoughts
There is something truly special about the No-Bake Woolworth Icebox Cheesecake Recipe that transcends generations. It’s quick to make, refreshingly light, and bursting with classic lemony flavor that makes any day a little brighter. If you’re looking for a dessert that’s easy, elegant, and guaranteed to impress, this recipe is a must-try. So grab your ingredients, invite some friends over, and enjoy this timeless treat together—you won’t regret it!
Print
No-Bake Woolworth Icebox Cheesecake Recipe
- Prep Time: 20 minutes
- Cook Time: 0 minutes
- Total Time: 4 hours 20 minutes
- Yield: 12 servings
- Category: Dessert
- Method: No-Bake
- Cuisine: American
- Diet: Vegetarian
Description
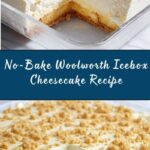
This No-Bake Woolworth Icebox Cheesecake is a classic American dessert featuring a creamy lemon-flavored filling made with lemon Jell-O, cream cheese, and whipped evaporated milk atop a buttery graham cracker crust. Easy to assemble and refrigerated to set, it’s a refreshing, tangy, and light treat perfect for warm days or nostalgic gatherings.
Ingredients
Filling
- 1 (3 oz) package lemon Jell-O
- 1 cup boiling water
- 1 (8 oz) package cream cheese, softened
- 1 cup granulated sugar
- 1 teaspoon vanilla extract
- 1 (12 oz) can evaporated milk, chilled
Crust
- 1 ½ cups graham cracker crumbs
- 5 tablespoons unsalted butter, melted
Instructions
- Dissolve Jell-O: In a medium bowl, dissolve the lemon Jell-O in 1 cup of boiling water. Stir until fully dissolved, then set aside to cool to room temperature.
- Make cream cheese mixture: In a large mixing bowl, beat the softened cream cheese, granulated sugar, and vanilla extract until smooth and creamy. Gradually add the cooled lemon Jell-O and mix thoroughly until well combined.
- Whip evaporated milk: In a chilled mixing bowl, whip the evaporated milk at high speed for about 3 to 5 minutes until stiff peaks form, ensuring a light and fluffy texture.
- Combine mixtures: Gently fold the whipped evaporated milk into the cream cheese and lemon Jell-O mixture, taking care to maintain its airy consistency.
- Prepare crust: In another bowl, mix graham cracker crumbs with melted butter until evenly coated. Press about two-thirds of this crumb mixture firmly into the bottom of a 9×13-inch pan to create the crust layer.
- Assemble cheesecake: Pour the prepared cheesecake filling over the crust and smooth the surface evenly. Sprinkle the remaining graham cracker crumbs evenly over the top of the filling to finish.
- Chill and set: Refrigerate the assembled cheesecake for at least 4 hours or preferably overnight until firm and set.
- Serve: Slice the chilled cheesecake into 12 servings and serve cold for best flavor and texture.
Notes
- For best results, chill the evaporated milk overnight before whipping to achieve optimal stiffness.
- You can substitute lemon Jell-O with strawberry or orange flavors for a fun variation of this dessert.
- This cheesecake keeps well refrigerated for up to 5 days, making it great for advance preparation.
