
If you have a soft spot for buttery, tender cookies that practically dissolve with every bite, then this Easy Melt-in-Your-Mouth Danish Butter Cookies Recipe is going to become your new go-to. Imagine a cookie so delicately crisp yet rich with buttery flavor, it feels like a warm hug wrapped in a sweet, golden treat. What makes these Danish butter cookies so special is their delicate balance of simple ingredients and a technique that brings out a tender crumb that truly melts right away. Whether you’re baking for a holiday, gifting goodies to friends, or just indulging yourself with a cozy afternoon snack, this recipe guarantees delicious results every time.
Ingredients You’ll Need
With just a handful of straightforward, pantry-friendly ingredients, you can create a batch of these irresistible cookies. Each component plays a critical role in crafting their classic texture and rich flavor, giving you a bakery-quality treat at home without any fuss.
- Butter (1 cup, room temperature): The star of the show—provides rich flavor and that signature melt-in-your-mouth texture.
- Powdered sugar (2/3 cup): Adds gentle sweetness and helps create the fine crumb of these cookies.
- All-purpose flour (1½ cups + 1 tablespoon): The base that holds everything together while keeping the cookies tender.
- Cornstarch (1/3 cup): The secret weapon for softness; it lightens the flour to ensure a delicate bite.
- Salt (1/4 teaspoon): Balances the sweetness and enhances the buttery flavor.
- Vanilla extract (1 teaspoon): Infuses a warm, inviting aroma that complements the buttery richness.
How to Make Easy Melt-in-Your-Mouth Danish Butter Cookies Recipe
Step 1: Preheat Your Oven and Prep Baking Sheets
Start by heating your oven to 340°F (170°C), then line two baking sheets with parchment paper. This setup ensures your cookies bake evenly and slide off effortlessly once done.
Step 2: Cream the Butter and Sugar
In a large mixing bowl, beat the softened butter with powdered sugar and vanilla extract until the mixture is light, fluffy, and pale in color—this usually takes about 2 to 3 minutes. This important step introduces air, which helps create that delicate texture that defines this Easy Melt-in-Your-Mouth Danish Butter Cookies Recipe.
Step 3: Combine Dry Ingredients
Next, sift together your flour, cornstarch, and salt to make sure there are no lumps. Gradually add this dry mixture to the creamed butter, folding gently on low speed just until combined. The aim is a soft, slightly pliable dough without over-mixing, which keeps your cookies tender instead of tough.
Step 4: Pipe Your Cookies
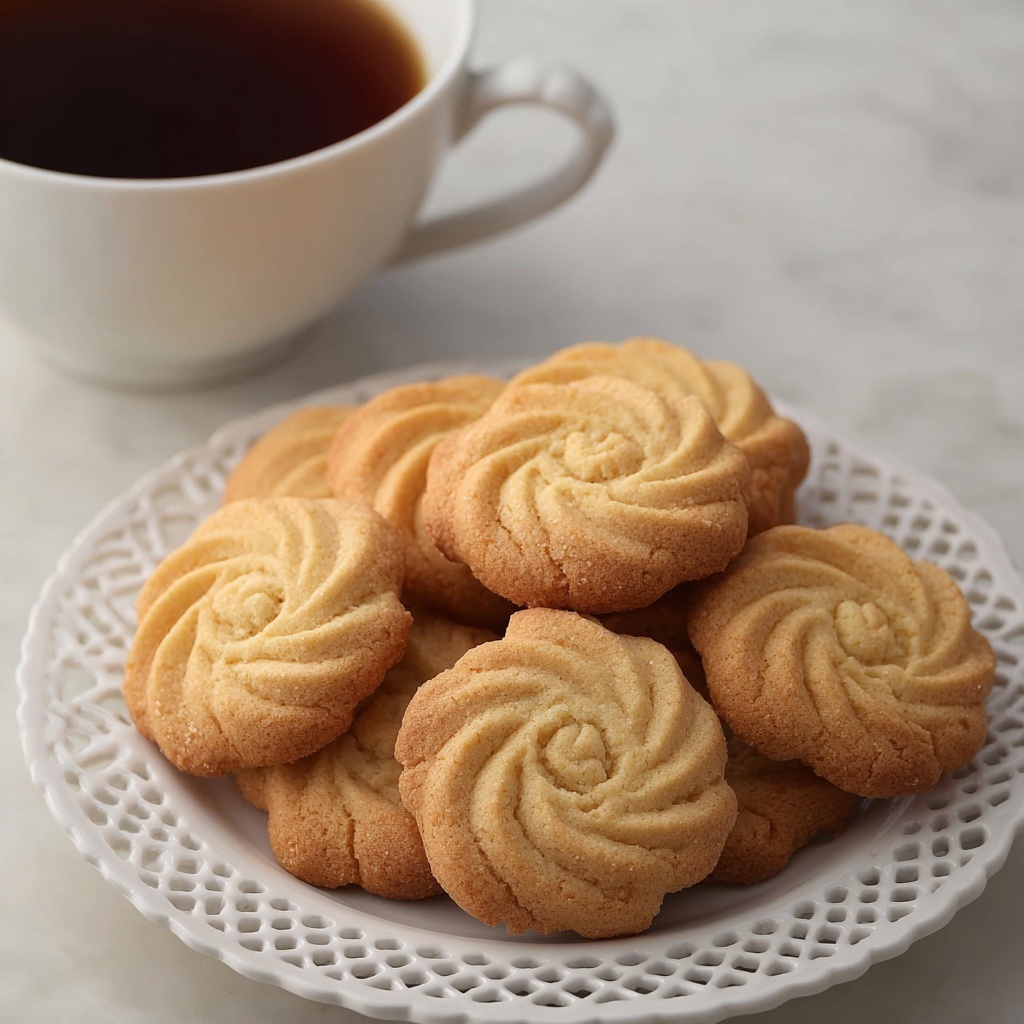
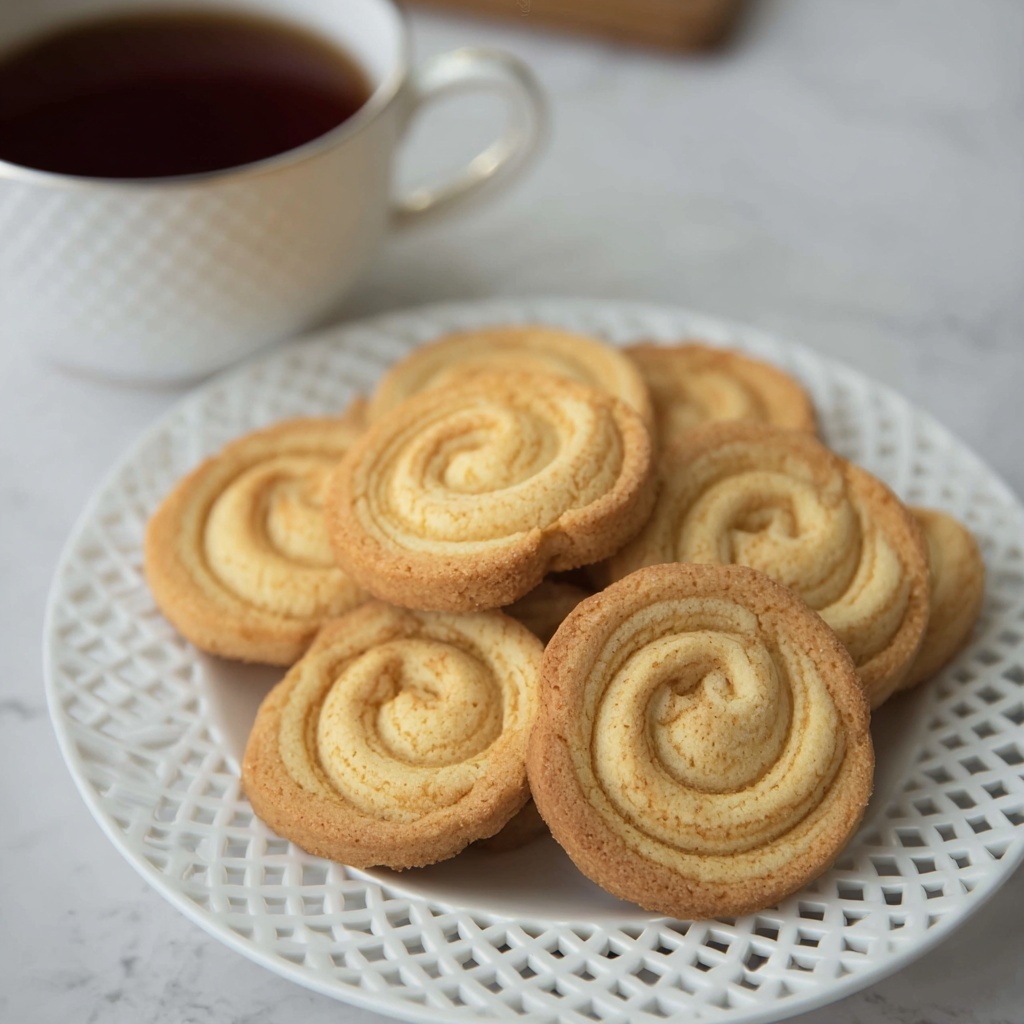
Transfer the dough into a piping bag with a large open star tip. Pipe 2-inch rosettes or circles onto your prepared baking sheets, spacing them a couple of inches apart. The lovely swirl patterns make these cookies every bit as delightful to look at as they are to eat.
Step 5: Chill Before Baking
Pop the trays into the fridge for about 20 to 30 minutes. Chilling your shaped dough firms it up and helps the cookies hold their shape as they bake, so you get beautifully defined edges instead of spread-out puddles.
Step 6: Bake Until Just Golden
Bake your cookies one sheet at a time for 12 to 15 minutes, or until the edges start showing a light golden tint. Keep an eye on them during the last few minutes to avoid over-browning, which would steal their tender character.
Step 7: Cool and Enjoy
Allow the cookies to cool completely on the baking sheets or a wire rack. As they cool, they firm up slightly but remain crisp on the outside and melt-in-your-mouth wonderfully on the inside, making them simply irresistible.
How to Serve Easy Melt-in-Your-Mouth Danish Butter Cookies Recipe
Garnishes
These cookies shine on their own, but a light dusting of powdered sugar can add a festive touch and an extra hint of sweetness. You could also dip the edges in melted chocolate or sprinkle with finely chopped nuts for a personalized flair.
Side Dishes
Pair your butter cookies with a hot cup of tea, coffee, or even a glass of cold milk for the ultimate cozy snack experience. Their buttery richness complements warm beverages perfectly, making every bite feel like a special treat.
Creative Ways to Present
Looking to impress guests? Arrange the cookies on a tiered dessert tray or serve them with a selection of jams and spreads. For holidays or celebrations, pack them beautifully in a decorative tin or cellophane bags tied with ribbon for charming homemade gifts.
Make Ahead and Storage
Storing Leftovers
Once fully cooled, store your butter cookies in an airtight container at room temperature. They will stay fresh and delightfully tender for up to a week, making them perfect for enjoying throughout the week or sharing.
Freezing
You can freeze the baked cookies by placing them in a single layer on a baking sheet initially, then transferring to a freezer bag once solid. Frozen cookies maintain their flavor and texture well, so you can keep a stash for those moments when a quick treat is needed.
Reheating
If you want to revive that just-baked feeling, warm the cookies gently in a low oven for a few minutes or microwave them briefly for about 10 seconds. This simple step softens the butter again and brings back that melt-in-your-mouth magic.
FAQs
Can I substitute margarine for butter in this recipe?
Butter is key for the flavor and texture in this recipe, so swapping it for margarine will change the taste and may affect the tender, melt-in-your-mouth quality that makes these cookies special. It’s best to stick to real butter if possible.
Why is cornstarch used in the dough?
Cornstarch lightens the flour’s effect and inhibits gluten development, which results in a softer, more tender cookie texture that truly melts on your tongue.
How do I prevent my cookies from spreading too much?
Chilling the piped dough before baking is essential. This step helps the cookies hold their beautiful shapes and prevents them from turning into thin, flat discs.
Can I make these cookies without piping?
While piping creates those classic rosettes and the perfect texture, you can shape the dough into small balls and flatten them gently if you don’t have a piping bag. Just be mindful that the texture might be slightly different.
How long do these cookies stay fresh?
Stored properly in an airtight container at room temperature, these butter cookies stay fresh for up to a week, maintaining their tender, melt-in-your-mouth quality throughout.
Final Thoughts
There is something truly comforting about the simple joy of biting into a perfectly baked homemade cookie, especially one as divine as this Easy Melt-in-Your-Mouth Danish Butter Cookies Recipe. It’s a recipe that’s as rewarding to make as it is to eat, promising a buttery, tender treat every time you bake it. Give this recipe a try—your kitchen will smell heavenly, and your taste buds will thank you for every exquisite bite.
Print
Easy Melt-in-Your-Mouth Danish Butter Cookies Recipe
- Prep Time: 20 minutes
- Cook Time: 15 minutes
- Total Time: 1 hour
- Yield: 34 servings
- Category: Dessert
- Method: Baking
- Cuisine: Danish
- Diet: Vegetarian
Description
These Easy Melt-in-Your-Mouth Butter Cookies are a classic Danish-style treat known for their delicate, crisp-yet-tender texture. Made with simple ingredients like butter, powdered sugar, and vanilla, these cookies are piped into pretty rosettes or circles, baked to a light golden perfection, and are perfect for any occasion or holiday.
Ingredients
Butter Cookie Dough
- 1 cup Butter (room temperature)
- 2/3 cup Powdered sugar
- 1½ cups + 1 tablespoon All-purpose flour
- 1/3 cup Cornstarch
- 1/4 teaspoon Salt
- 1 teaspoon Vanilla extract
Instructions
- Preheat the oven: Set your oven to 340°F (170°C). Line two baking sheets with parchment paper and set aside to prepare for the cookies.
- Cream the butter and sugar: In a large mixing bowl, beat the softened butter, vanilla extract, and powdered sugar using a hand or stand mixer on medium speed until the mixture is light, creamy, and fluffy, about 2–3 minutes. This step is crucial for incorporating air into the dough to achieve the melt-in-your-mouth texture.
- Add the dry ingredients: Sift together the all-purpose flour, cornstarch, and salt. Add these dry ingredients to the butter mixture in two additions, mixing gently on low speed just until combined. The dough should be soft but not sticky. Be careful not to over-mix, as this could toughen the cookies.
- Pipe the cookies: Transfer the dough into a piping bag fitted with a large open star tip. Pipe 2-inch (5 cm) rosettes or circles onto the prepared baking sheets, leaving some space between each cookie to allow for slight spreading during baking.
- Chill the cookies: Refrigerate the piped cookies for 20–30 minutes. This chilling step helps the cookies retain their shape during baking and prevents spreading.
- Bake: Place one baking sheet in the preheated oven at a time and bake for 12–15 minutes or until the edges are just lightly golden. Avoid overbaking to maintain a tender texture.
- Cool and serve: Let the cookies cool completely on the baking sheet or transfer to a wire rack. Once cooled, enjoy their delicate, crisp-yet-tender, melt-in-your-mouth texture.
Notes
- Using room temperature butter makes it easier to cream and results in a fluffier dough.
- Do not overmix the dough once the flour is added to keep the cookies tender.
- Chilling the cookies before baking is essential for maintaining their shape and preventing spreading.
- Pipe the cookies as close to the size suggested (2 inches/5 cm) for even baking and perfect texture.
- Store the cookies in an airtight container at room temperature for up to one week.


