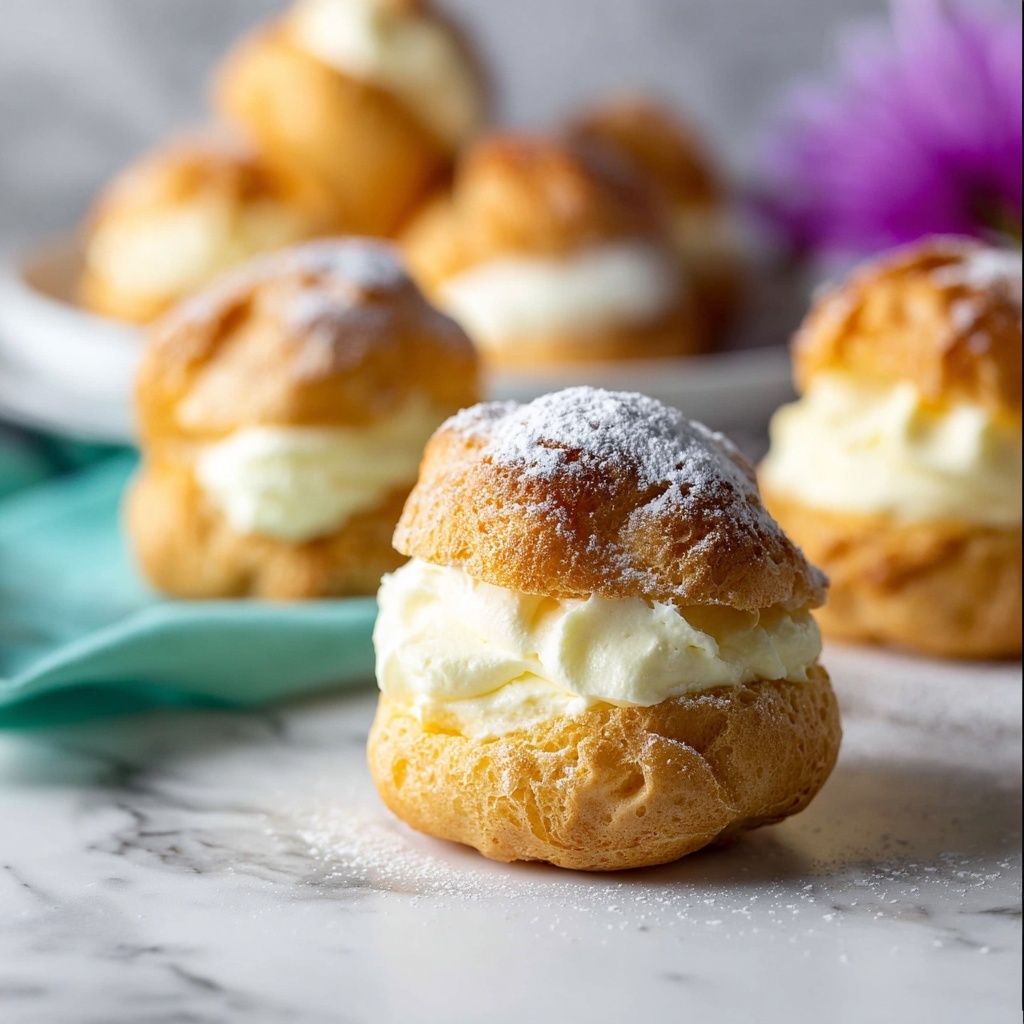
If you have a soft spot for delicate desserts that feel like little clouds of joy, then you absolutely must try this Cream Puffs with Homemade Pastry Cream Recipe. These cream puffs marry a light, airy choux pastry shell with a luscious, velvety homemade vanilla pastry cream that is simply irresistible. The combination is classic but feels effortlessly elegant, with each bite delivering a perfect balance of sweetness and texture. Whether you’re making these for a special occasion or just because, this recipe promises to impress and delight everyone lucky enough to enjoy them.
Ingredients You’ll Need
This recipe relies on simple, straightforward ingredients that come together to create something truly magical. Each component plays an important role, from the richness of butter that gives the pastry its tender crumb, to the fresh eggs that create the signature lightness in the dough, and the vanilla bean that infuses the pastry cream with aromatic warmth.
- Whole milk: Provides creaminess and a smooth base for the pastry cream.
- Heavy cream: Adds richness and depth to the custard.
- Granulated sugar (divided): Sweetens both the pastry cream and dough just right.
- Vanilla bean: Infuses an authentic vanilla flavor that beats any extract.
- Salt: Enhances all the sweet and buttery flavors.
- Large egg yolks: Add richness and help thicken the pastry cream.
- Cornstarch: Key to thickening the pastry cream to that perfectly smooth consistency.
- Unsalted butter (softened and divided): One portion enriches the pastry cream, while the rest creates tender, flaky puffs.
- Water: Steams up the choux pastry, creating those hollow pockets essential for cream puffs.
- All-purpose flour: Forms the structure of the pastry shells.
- Large eggs: Give the choux dough lift and elasticity.
- Powdered sugar: For a dusting that adds an elegant finish.
How to Make Cream Puffs with Homemade Pastry Cream Recipe
Step 1: Prepare the Pastry Cream
Start by whisking together the foundation of the pastry cream. In a saucepan, combine the milk, heavy cream, a portion of sugar, the split vanilla bean, and salt. Warm it gently until it simmers, releasing that intoxicating vanilla aroma. Meanwhile, whisk egg yolks and the remaining sugar in a bowl, then blend in cornstarch. Temper the egg mixture by slowly adding warmed milk to prevent scrambling. Return everything to the stove, whisking continuously until it thickens into a velvety custard. Finish by stirring in butter for extra richness, and cover with plastic wrap pressed against the surface to avoid skin formation. Pop it into the fridge to chill.
Step 2: Make the Choux Pastry
Preheat your oven to 400°F (200°C) and get your baking sheets ready with parchment paper. On the stove, bring water, butter, and salt to a rolling boil. Add the flour all at once, stirring vigorously until it pulls away from the pan as a smooth ball. Let it cool slightly, then beat in eggs one at a time until your dough is shiny and smooth—a texture that’s the perfect balance of sticky and pipable.
Step 3: Pipe and Bake the Cream Puffs
Transfer the dough into a piping bag and dollop it onto your parchment in consistent mounds about 2 inches wide. Smooth any peaks with damp fingers; this helps them bake evenly and maintains their shape. Bake for 30 minutes until golden and dry. Then pierce each puff to release steam and return them to the hot oven with the door slightly open for 10 minutes to crisp up the insides beautifully.
Step 4: Assemble Your Cream Puffs
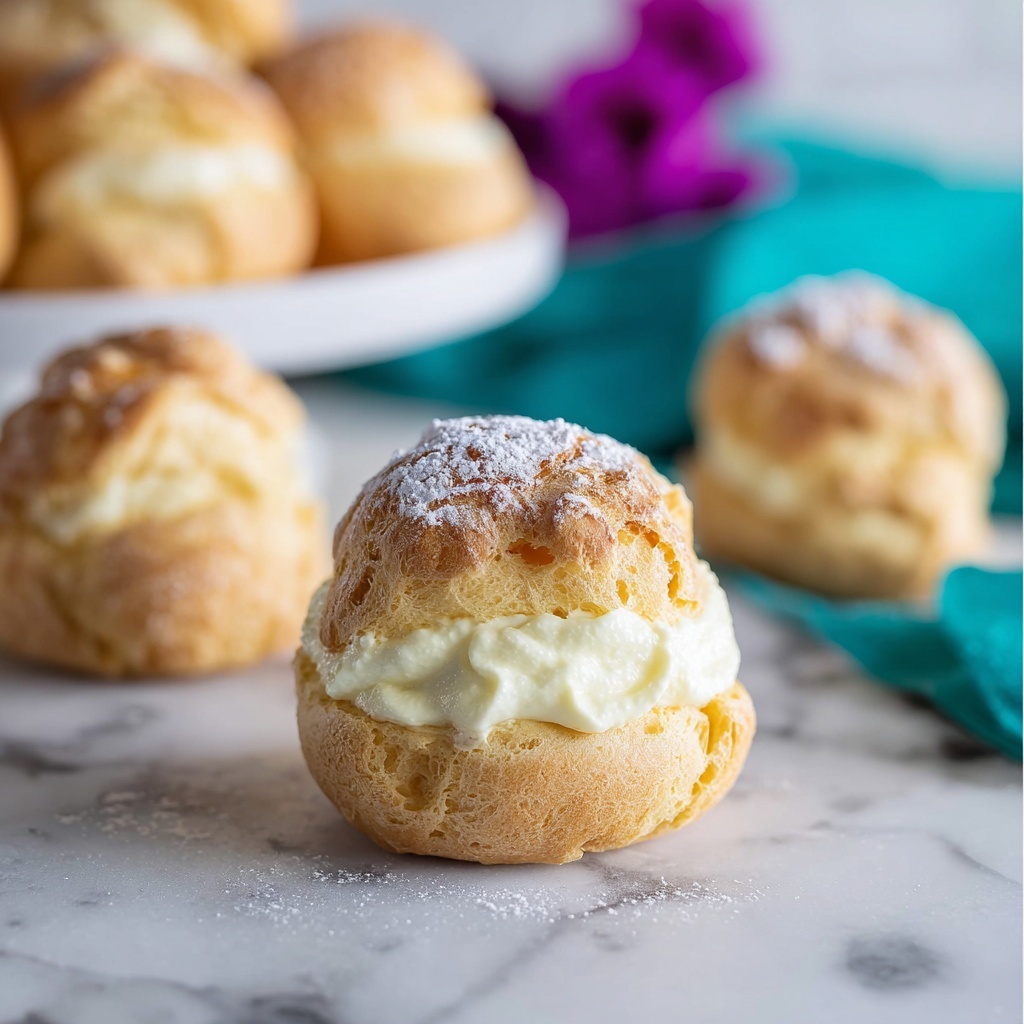
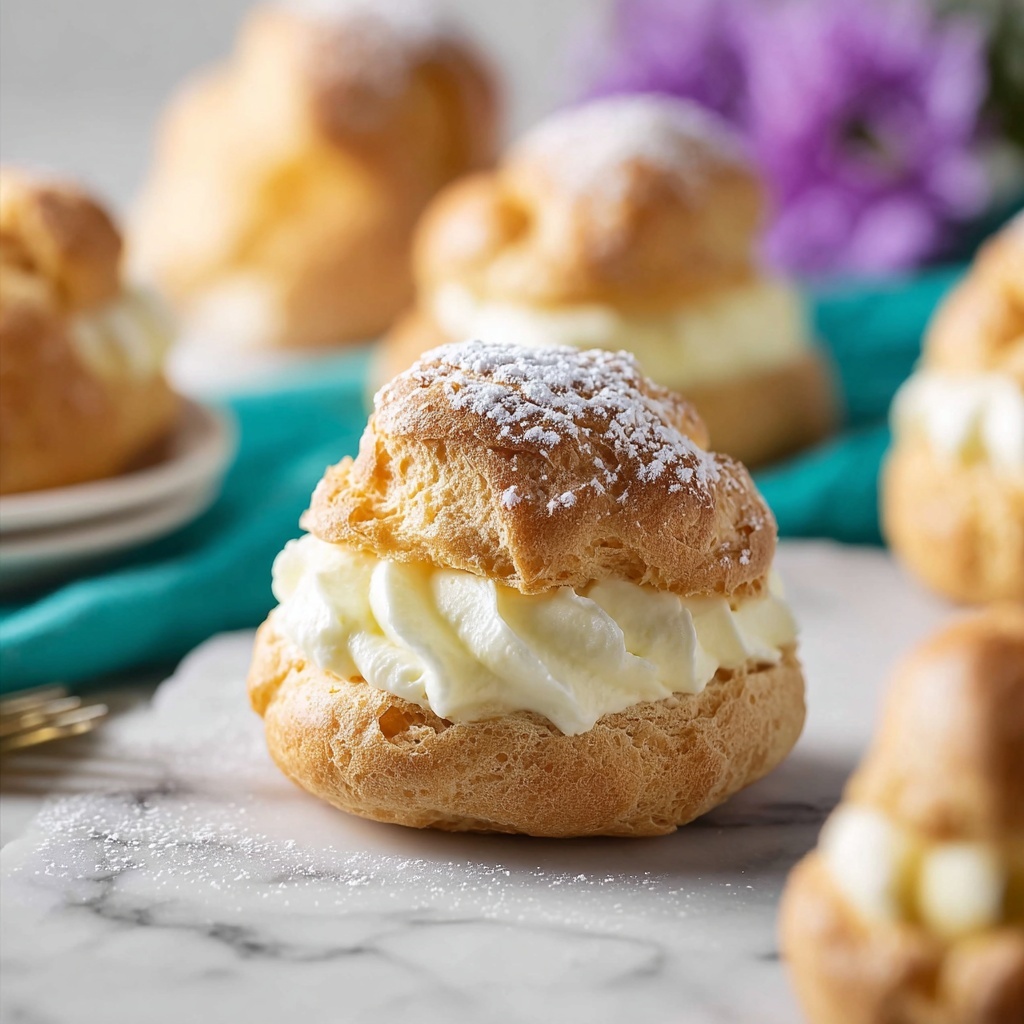
Allow the puffs to cool completely. Then fit a piping bag with a small tip, fill it with chilled pastry cream, and gently pipe into each puff through the hole you made earlier. Fill until the cream just peeks out. Finish with a light dusting of powdered sugar for that perfect bakery look and a touch of added sweetness.
How to Serve Cream Puffs with Homemade Pastry Cream Recipe
Garnishes
To elevate your Cream Puffs with Homemade Pastry Cream Recipe, consider topping with a sprinkle of powdered sugar or a drizzle of melted chocolate for an elegant twist. Fresh berries or mint leaves also add a pop of color and a fresh contrast to the creamy filling, making presentation irresistible.
Side Dishes
These cream puffs shine as the star dessert but pairing them with a light fruit salad or a scoop of refreshing sorbet can perfectly balance the richness. A cup of freshly brewed coffee or a glass of sparkling wine complements the creamy sweetness spectacularly.
Creative Ways to Present
Think about arranging your cream puffs in a classic croquembouche tower for a stunning centerpiece, or fill mini puffs to serve bite-sized delights at a party. You can also sandwich two halves with pastry cream and fresh fruit to create cream puff sandwiches that add a playful and delicious variation.
Make Ahead and Storage
Storing Leftovers
Store your filled cream puffs in an airtight container in the refrigerator for up to 2-3 days. Keep in mind the pastry can soften as it absorbs moisture from the cream, so enjoying them fresh is always best.
Freezing
You can freeze unfilled cream puffs for several weeks on a parchment-lined tray before transferring them to a freezer-safe container or bag. When ready to enjoy, thaw at room temperature then fill with fresh pastry cream for the best texture.
Reheating
To refresh the puff shells before filling, warm them in a 350°F (175°C) oven for about 5-7 minutes until crisp again. Never heat cream-filled puffs, as the cream can separate. Fill them only after reheating for that fresh-baked sensation.
FAQs
Can I use vanilla extract instead of a vanilla bean in this Cream Puffs with Homemade Pastry Cream Recipe?
Absolutely! If you don’t have a vanilla bean on hand, simply add about one teaspoon of vanilla extract after cooking the pastry cream and removing it from heat. You’ll still get lovely vanilla flavor, though the bean adds a more intense and aromatic note.
What can I do if my pastry cream is too thin?
If your pastry cream isn’t thick enough, return it to the stove and cook it a bit longer while whisking continuously. You can also whisk in a small extra bit of cornstarch dissolved in milk to help it firm up. Remember to chill it well before filling your puffs.
Why do my cream puffs collapse or turn out flat?
Common culprits are undercooked dough or opening the oven door too early. Make sure you bake them fully until golden and dry, and avoid opening the oven door during the initial baking phase to maintain the steam that helps raise the pastry.
How long can I keep the cream puffs after filling them?
Once filled, cream puffs are best eaten within 2-3 days and must be refrigerated. The pastry will gradually soften as it absorbs moisture, so enjoy them as fresh as possible for the perfect texture.
Can I make this Cream Puffs with Homemade Pastry Cream Recipe gluten-free?
Yes, you can substitute the all-purpose flour with a gluten-free baking flour blend that is suitable for pastries. The texture might be slightly different, but the cream puffs should still turn out delicious with careful mixing and baking.
Final Thoughts
I truly hope you feel inspired to whip up this Cream Puffs with Homemade Pastry Cream Recipe soon. It’s one of those timeless desserts that feels so rewarding to make and practically melts in your mouth. Whether you’re treating yourself or impressing friends and family, these cream puffs bring a little sunshine and sweetness to any day. Have fun baking and savor every bite!
Print
Cream Puffs with Homemade Pastry Cream Recipe
- Prep Time: 45 minutes
- Cook Time: 35 minutes
- Total Time: 4 hours 35 minutes
- Yield: 20 servings
- Category: Dessert
- Method: Baking
- Cuisine: French
Description
Classic French Cream Puffs feature delicate choux pastry shells filled with a luscious homemade vanilla pastry cream. This recipe guides you through making the perfect airy puffs and a rich, silky custard filling, resulting in an elegant dessert that’s light yet indulgent. Enjoy dusted with powdered sugar for a beautiful finish.
Ingredients
Pastry Cream
- 1 cup whole milk
- 1 cup heavy cream
- ⅓ cup + 3 Tablespoons granulated sugar (divided)
- 1 vanilla bean (split in half lengthwise)
- ¼ teaspoon salt
- 5 large egg yolks (room temperature)
- 3 Tablespoons cornstarch
- 4 Tablespoons unsalted butter (softened and cut into 4 pieces)
Choux Pastry
- 1 cup water
- ½ cup unsalted butter (cut into 8 pieces)
- ¼ teaspoon salt
- 1 cup all purpose flour
- 4 large eggs (room temperature)
Finishing
- Powdered sugar (for dusting cream puffs)
Instructions
- Prepare Pastry Cream: Combine cream, milk, ⅓ cup sugar, vanilla bean, and salt in a medium heavy-bottomed saucepan. Heat over medium, stirring frequently until sugar dissolves and mixture simmers. Remove from heat and cool for 10 minutes, stirring occasionally.
- Mix Egg Mixture: In a large bowl, whisk together egg yolks and 3 tablespoons sugar for 15 seconds until sugar begins dissolving. Sprinkle cornstarch over mixture and whisk until combined and slightly thickened.
- Temper Eggs: Slowly drizzle about ⅓ cup of warm cream mixture into egg mixture while whisking constantly to prevent curdling. Continue whisking as you gradually add the rest of the cream mixture until fully combined.
- Cook Pastry Cream: Return combined mixture to saucepan and heat over medium heat, whisking frequently until thickened. Remove from heat and strain through a fine mesh sieve into a heatproof bowl, discarding the vanilla bean pod.
- Add Butter: Whisk in softened butter pieces one at a time until fully incorporated. If not using vanilla bean, stir in vanilla extract now. Cover surface with plastic wrap to prevent skin formation and let cool at room temperature for 30 minutes. Then refrigerate for 2 to 4 hours to chill.
- Prepare Choux Pastry: Preheat oven to 400°F (200°C). Line baking sheets with parchment paper. In a medium saucepan over medium heat, bring water, butter, and salt to rolling boil.
- Add Flour: Remove from heat and immediately add flour. Return to medium/low heat and stir constantly until dough forms a ball and pulls away from sides of pan.
- Cool Dough and Add Eggs: Remove from heat and stir to cool dough for a few minutes. Add eggs one at a time, stirring well after each addition until mixture is smooth and glossy.
- Pipe Choux Mounds: Transfer dough to piping bag fitted with round tip. Pipe mounds approximately 2 inches wide and 1 inch tall, spacing 1.5 inches apart on prepared sheets. Moisten fingers with water to smooth any peaks.
- Bake Puffs: Bake for 30 minutes until dry and light golden brown. Remove from oven and use a sharp knife to pierce bottom center of each puff halfway through to release steam.
- Dry Puffs in Oven: Return puffs to oven, turn oven off, and crack door open. Let them dry inside oven for 10 minutes. Remove and cool completely on baking sheets.
- Fill Puffs with Pastry Cream: Transfer chilled pastry cream into piping bag with small tip. Insert tip into each puff’s hole and fill until cream begins to emerge.
- Finish and Serve: Lightly dust filled cream puffs with powdered sugar just before serving to preserve texture. Store leftovers in airtight container in refrigerator for 2-3 days or freeze for longer storage.
Notes
- Tempering the eggs with warm cream is crucial to avoid cooking scrambled eggs.
- Be sure to pierce the cream puffs after baking to let steam escape and prevent sogginess.
- Vanilla bean gives the pastry cream an intense flavor, but vanilla extract is an acceptable alternative.
- Use room temperature eggs for better incorporation into dough.
- Store cream puffs unfilled at room temperature up to a day, but fill only when ready to serve for best texture.

