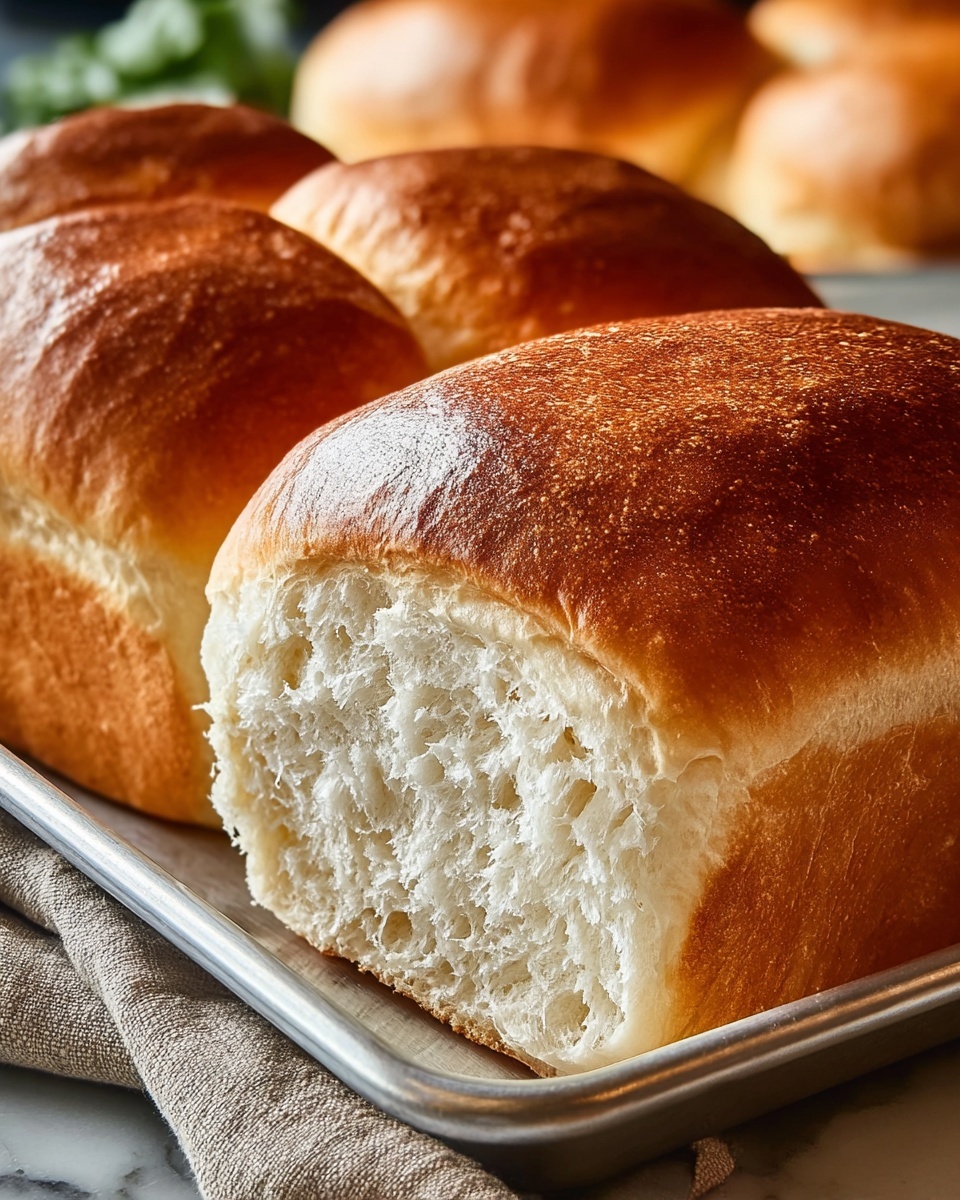
If you’ve ever dreamed of biting into a fresh, soft, and delightfully fluffy loaf straight from your own oven, this Easy Homemade White Bread Recipe is your new best friend. It blends simple pantry staples into a warm, golden-hued loaf that not only fills your kitchen with the most comforting aroma but also delivers that perfect balance of tenderness and a slight crusty bite. Whether you’re a novice baker or just looking for a reliable classic to add to your repertoire, this recipe is approachable, forgiving, and absolutely worth every minute of effort.

Ingredients You’ll Need
Getting started with this bread is a breeze because it calls for ingredients you likely already have on hand. Each one plays a crucial role in crafting the texture, flavor, and appearance of this loaf, making the magic happen from simple to spectacular.
- All-purpose flour: Provides the structure and soft crumb essential to classic white bread; extra flour helps with kneading without sticking.
- Active dry yeast: The powerhouse that makes the bread rise beautifully, creating those airy bubbles inside.
- Sugar: Feeds the yeast to get it bubbling and adds just a touch of sweetness to balance flavors.
- Salt: Enhances the overall flavor, keeping the bread from tasting flat and helping to control yeast activity.
- Warm water (110°F/45°C): Activates the yeast perfectly – not too hot to kill it, not too cool to keep it dormant.
- Unsalted butter (melted): Adds richness, tenderness, and a subtle buttery flavor to the loaf.
- Vegetable oil: Used for greasing, ensuring the dough won’t stick to your bowl or pan, while adding a slight moistness to the crust.
How to Make Easy Homemade White Bread Recipe
Step 1: Activate the yeast
Start by combining the warm water, sugar, and yeast in a small bowl. This little science experiment is essential – letting it sit for 5 to 10 minutes until it turns frothy ensures your yeast is alive and ready to do its job. A lively yeast mixture is the key to a well-risen bread, so don’t rush this step.
Step 2: Mix the dough
In a large bowl, mix your flour and salt, then create a well in the center to pour in your yeast mixture and melted butter. Stir everything together with a wooden spoon or your hands just until the dough starts coming together. This is where the ingredients begin their journey into bread.
Step 3: Knead the dough
Turning the dough onto a floured surface, knead it for 8 to 10 minutes until it becomes smooth and elastic. Kneading develops gluten, which is what gives bread its chewy and airy texture—you’ll almost feel the dough transform under your hands. If it’s sticky, a light sprinkle of extra flour is your friend, but don’t overdo it.
Step 4: First rise
Coat a large bowl with vegetable oil and pop your kneaded dough inside, turning it to lightly coat with oil. Cover it with a kitchen towel and set it somewhere warm and cozy. This resting period, lasting about 1 to 1.5 hours, allows the dough to double in size—proof that your yeast is working and the bread will be delightfully fluffy.
Step 5: Shape the loaf
Punch down the risen dough to release air, then transfer it back to a floured surface. Shape the dough into a tight loaf by folding the edges inward and rolling it out, then place it into a greased loaf pan. This step helps form the beautiful, classic loaf shape we all love.
Step 6: Second rise
Cover your loaf pan with a towel and let the dough rise again for 30 to 40 minutes until it’s about an inch above the edge of the pan. This second proofing adds volume and lightness, setting the stage for a perfect bake.
Step 7: Bake
Preheat your oven to 375°F (190°C). Bake the bread for 25 to 30 minutes until the crust is a golden brown and the loaf sounds hollow when tapped. If you like precision, check for an internal temperature of around 190°F (88°C) to ensure it’s perfectly done. The aroma filling your kitchen at this point will be absolutely irresistible.
Step 8: Cool
Leave the bread to cool in the pan for 10 minutes before transferring it to a wire rack. Allowing it to cool completely prevents sogginess and makes slicing easier, preserving that soft crumb texture.
Step 9: Slice and enjoy
Finally, slice your beautifully baked loaf and relish the fresh taste of homemade! Whether slathered with butter, layered with your favorite jam, or used to build a sandwich masterpiece, this bread is a delicious canvas for endless possibilities.
How to Serve Easy Homemade White Bread Recipe

Garnishes
A simple sprinkle of sea salt or herbs like rosemary on top before baking can elevate the loaf’s flavor. After baking, a spread of butter or a drizzle of honey makes for a warm, comforting bite.
Side Dishes
This bread pairs wonderfully with soups, stews, and salads, offering the perfect base to soak up flavorful broths or add crunch to veggie dishes. It’s a favorite alongside creamy tomato soup or a hearty bowl of chili.
Creative Ways to Present
Turn slices of the bread into delicious toast with avocado and radish toppings, or whip up French toast for breakfast or brunch. You can even cube leftover bread for homemade croutons or bread pudding, giving new life to every crumb.
Make Ahead and Storage
Storing Leftovers
Wrap your leftover bread tightly in plastic wrap or foil and keep it at room temperature for up to three days. This keeps the loaf soft and fresh. Avoid refrigerating, as this tends to dry out the bread faster.
Freezing
If you want to enjoy this Easy Homemade White Bread Recipe longer, slice and freeze it in an airtight bag. Frozen bread keeps well for up to three months and lets you enjoy fresh slices anytime with minimal effort.
Reheating
To bring back that fresh-baked warmth, toast frozen slices directly or gently warm whole or partial loaves in a 350°F oven wrapped in foil for about 10-15 minutes. This little trick restores its soft crumb and crusty exterior beautifully.
FAQs
Can I use bread flour instead of all-purpose flour?
Absolutely! Bread flour has more protein, which can make your loaf even chewier and more structured, but all-purpose flour works perfectly well and yields a tender, classic white bread texture.
What if my dough doesn’t rise?
If the dough isn’t doubling in size, check your yeast freshness and water temperature. Yeast that’s too hot or too cold may not activate, and old yeast might be less effective, so always use a fresh packet and warm water as instructed.
Can I add seeds or grains to the dough?
Yes, feel free to mix in flaxseed, sunflower seeds, or oats for extra texture and flavor. Add about 1/4 cup during the initial mixing – it’s a lovely way to customize your bread.
Is this recipe suitable for making sandwich bread?
Definitely! Its soft texture and sturdy crumb make it ideal for sandwiches, holding fillings well without falling apart or getting soggy quickly.
How do I make the crust crispier?
For a crunchier crust, you can brush the loaf with water or melted butter before baking or place a small pan of water in the oven to create steam. This helps form that crisp outer layer while keeping the inside soft.
Final Thoughts
This Easy Homemade White Bread Recipe is more than just a fantastic base for countless meals — it’s a cozy, rewarding baking experience that fills your kitchen with love and warmth. I can’t wait for you to try it out, enjoy the process, and savor every slice of your homemade success!
Print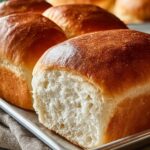
Easy Homemade White Bread Recipe
- Prep Time: 20 minutes
- Cook Time: 30 minutes
- Total Time: 1 hour 50 minutes to 2 hours
- Yield: 1 loaf (8-10 slices)
- Category: Bread
- Method: Baking
- Cuisine: American
Description
This Easy Homemade White Bread recipe yields a soft, fluffy loaf perfect for sandwiches or toast. Made with simple ingredients like all-purpose flour, yeast, and butter, this classic bread is risen twice for the best texture and baked to a golden perfection.
Ingredients
Dough Ingredients
- 2 ½ cups all-purpose flour (plus extra for kneading)
- 1 packet active dry yeast (2 ¼ teaspoons)
- 1 tablespoon sugar
- 1 teaspoon salt
- 1 cup warm water (110°F / 45°C)
- 2 tablespoons unsalted butter (melted)
- 1 tablespoon vegetable oil (or more for greasing)
Instructions
- Activate yeast: In a small bowl, combine warm water, sugar, and yeast. Stir gently and let sit for 5-10 minutes until frothy and bubbly, indicating the yeast is active.
- Mix dry ingredients: In a large mixing bowl, stir together the flour and salt. Make a well in the center.
- Combine dough: Pour the yeast mixture and melted butter into the flour well. Stir with a wooden spoon or hands until dough begins to form.
- Knead dough: Transfer dough to a floured surface and knead for 8-10 minutes, adding a dusting of flour if sticky, until smooth and elastic.
- First rise: Lightly oil a large bowl, place dough inside, turning to coat with oil. Cover with a kitchen towel and let rise in a warm, draft-free spot for 1 to 1.5 hours until doubled in size.
- Punch down dough: Release air by pressing down on dough. Shape into a loaf by folding edges inward and rolling tightly. Place in a greased 9×5-inch loaf pan.
- Second rise: Cover loaf pan with a towel and let dough rise 30-40 minutes until it rises about 1 inch above pan edge.
- Bake bread: Preheat oven to 375°F (190°C). Bake loaf 25-30 minutes until top is golden brown and loaf sounds hollow when tapped. Internal temperature should be about 190°F (88°C).
- Cool and slice: Cool bread in pan for 10 minutes, then transfer to wire rack to cool completely before slicing and serving.
Notes
- Ensure water temperature is warm but not hot to avoid killing yeast.
- Add flour gradually during kneading to avoid a dry loaf.
- Letting the dough rise in a warm, draft-free environment helps yeast activity.
- Use a thermometer to check bread for perfect doneness.
- Store leftover bread in an airtight container to keep it fresh.


