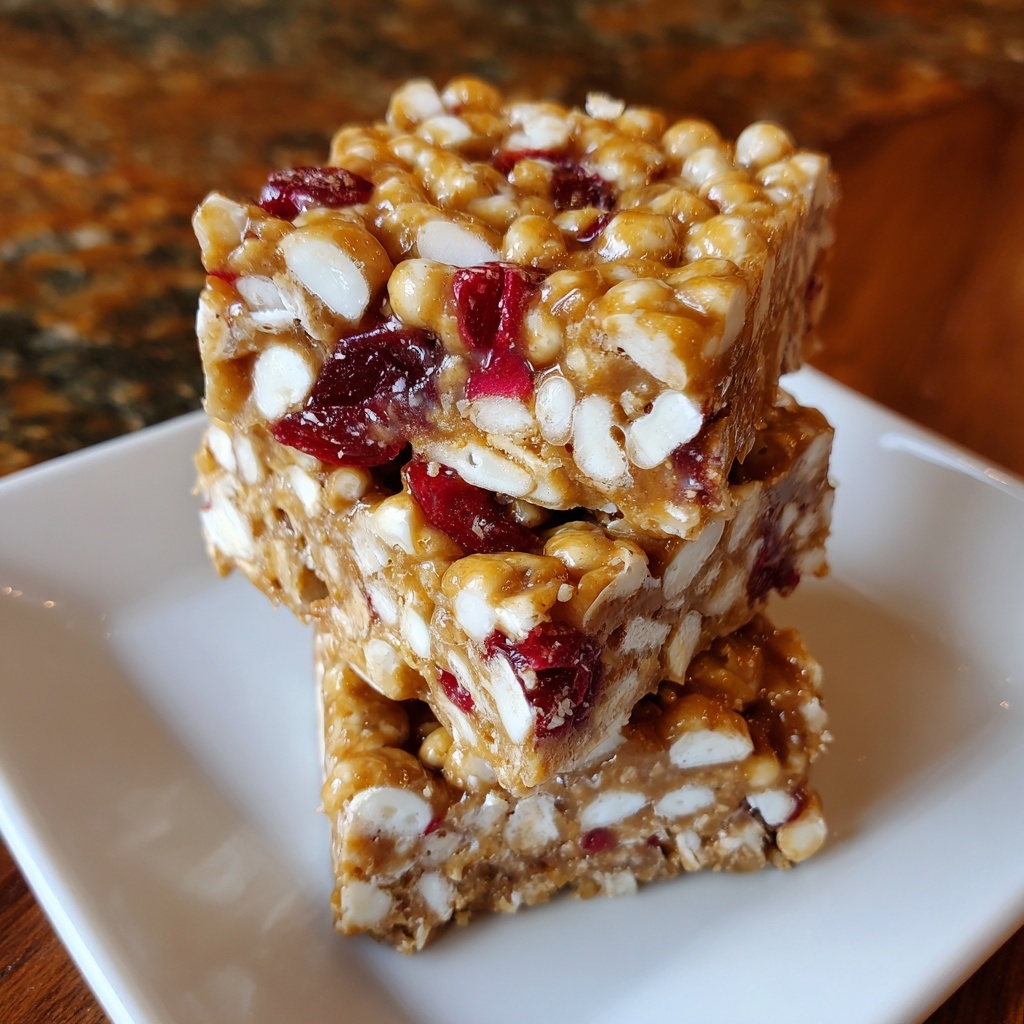
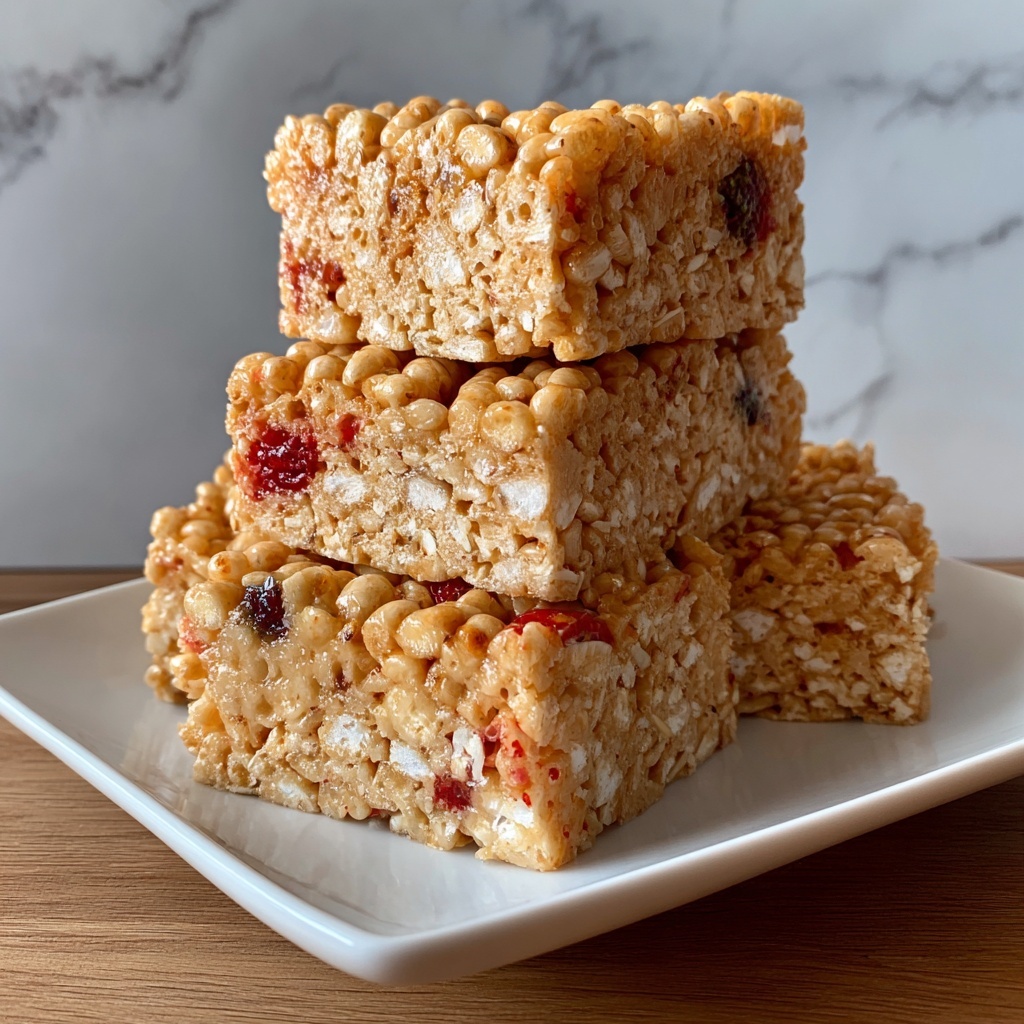
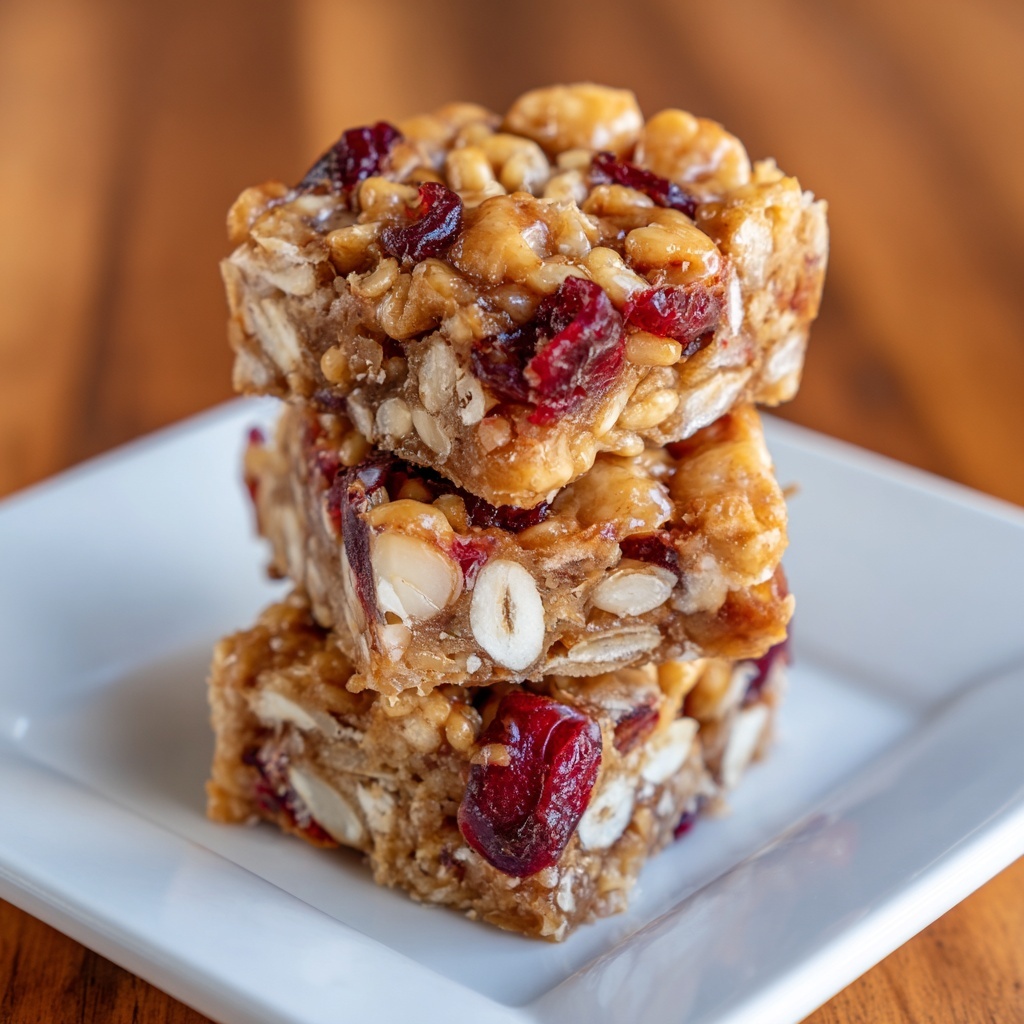
If you’re looking for a snack that’s both wholesome and irresistibly tasty, this Cereal Bars Recipe is an absolute winner. Combining the crunch of crispy rice cereal and the heartiness of rolled oats with the natural sweetness of honey and the creamy richness of peanut butter, these bars make for the perfect grab-and-go treat. Whether you need a quick breakfast, a midday energy boost, or a kid-friendly snack, this recipe hits all the right notes with delightful texture and flavor.
Ingredients You’ll Need
What’s amazing about this recipe is how a handful of simple, pantry-friendly ingredients come together to create something so delicious and satisfying. Each component plays a key role, from providing structure and crunch to delivering sweetness and depth.
- 3 cups crispy rice cereal or mixed whole-grain cereal: For that iconic crunch and a light texture that holds the bars together.
- 1 cup rolled oats: Adds a chewy bite and wholesome goodness, boosting the fiber content.
- ½ cup honey or maple syrup: Natural sweeteners that bind and flavor the bars with a gentle, mellow sweetness.
- ½ cup peanut butter or almond butter: Brings creaminess, healthy fats, and a delicious nutty essence.
- 1 teaspoon vanilla extract: Enhances the overall flavor with a warm vanilla note.
- ¼ teaspoon salt: Balances the sweetness and elevates the other flavors beautifully.
- Optional: ¼ cup mini chocolate chips or dried fruit: These add bursts of extra flavor and a touch of fun to each bite.
How to Make Cereal Bars Recipe
Step 1: Prepare Your Pan
Start by lining an 8×8-inch baking dish with parchment paper. Make sure to leave some overhanging edges—this will make lifting out your bars a breeze after they’ve chilled. This simple step saves you from any sticky mess later on.
Step 2: Combine the Dry Ingredients
In a large bowl, gently mix together the crispy rice cereal and rolled oats. This combination is the heart of your bars, providing the lovely mixture of crunchy and chewy textures everyone loves.
Step 3: Melt and Mix the Wet Ingredients
Place the honey (or maple syrup) and peanut butter (or almond butter) in a small saucepan over low heat. Stir continuously until the mixture is smooth and perfectly combined. Then, remove from heat and stir in the vanilla extract and salt. This warm, luscious mixture will help bind everything together while infusing rich flavor.
Step 4: Combine Wet and Dry Mixtures
Pour the peanut butter mixture over the dry cereal and oat blend. Stir thoroughly until every piece is evenly coated. If you’re adding mini chocolate chips or dried fruit, fold them in carefully now, ensuring they’re evenly distributed without crushing.
Step 5: Press and Chill
Transfer the mixture into your prepared baking dish. Use the back of a spoon or a spatula to press it down firmly and evenly—this step is key for bars that hold their shape perfectly. Then, pop it into the refrigerator for at least one hour to set and firm up.
Step 6: Cut and Enjoy
Once fully chilled, use the overhanging parchment paper to lift out the entire slab. Place it on a cutting board and slice into 12 evenly sized bars. Now you’re ready to enjoy your homemade cereal bars anytime!
How to Serve Cereal Bars Recipe
Garnishes
Adding a sprinkle of flaky sea salt or a light dusting of cocoa powder on top before chilling can elevate these bars with extra bursts of flavor. If you like, drizzle a little melted chocolate or a swirl of nut butter for a gourmet touch that will impress everyone.
Side Dishes
These bars pair beautifully with a fresh fruit smoothie, a hot cup of tea or coffee, or even a small bowl of yogurt for a balanced snack. The nutty, sweet bars complement fruity and creamy sides wonderfully.
Creative Ways to Present
For an adorable snack box or gift, wrap individual bars in wax paper tied with a ribbon or place them in mini mason jars layered with nuts and dried fruit. You can also cut the bars into fun shapes using cookie cutters—perfect for kids’ lunchboxes or festive occasions.
Make Ahead and Storage
Storing Leftovers
Keep your cereal bars fresh by storing them in an airtight container at room temperature. They’ll stay firm and tasty for up to a week, making them a convenient, ready-to-eat snack whenever hunger strikes.
Freezing
These bars freeze beautifully for up to three months. Wrap each bar individually in plastic wrap and place them in a freezer-safe container or bag. When you want a quick snack, just thaw at room temperature or pop directly into a lunchbox to soften by lunchtime.
Reheating
If you prefer warm bars, gently microwave a single bar for 10-15 seconds. This softens the peanut butter slightly and makes the bars even more comforting, especially on chilly days.
FAQs
Can I use different types of cereal for this Cereal Bars Recipe?
Absolutely! While crispy rice cereal is classic, you can try mixed whole-grain cereals or even gluten-free options to suit your taste and dietary needs. Just ensure the cereal is dry and crunchy to maintain the perfect texture.
What’s the best nut butter to use?
Peanut butter offers a rich and familiar flavor, but almond butter or even sunflower seed butter work wonderfully for different flavor profiles or nut allergies. Choose the type that you enjoy most or have on hand.
How can I make these bars vegan?
Use maple syrup instead of honey and ensure your nut butter is vegan-friendly. Most other ingredients are naturally vegan, making this recipe easy to adjust.
Can I add protein powder or other supplements?
Yes, you can boost the nutrition by adding a scoop of your favorite protein powder or mix in chia seeds, flaxseeds, or hemp hearts for extra fiber and omega-3s. Just adjust the wet ingredients slightly if the mixture becomes too dry.
How long do the cereal bars keep fresh?
When stored in an airtight container at room temperature, these bars are good for up to one week. For longer storage, freezing is your best bet to keep them fresh and tasty.
Final Thoughts
This Cereal Bars Recipe is such a joy to make and share, offering a tasty, nutritious snack that fits seamlessly into any busy lifestyle. I hope you’ll enjoy making these bars as much as eating them—they’re perfect for all ages and occasions. Give this recipe a try and watch how quickly these bars become a favorite in your home!
Print
Cereal Bars Recipe
- Prep Time: 15 minutes
- Cook Time: 5 minutes
- Total Time: 1 hour 20 minutes
- Yield: 12 bars
- Category: Snack
- Method: Stovetop
- Cuisine: American
- Diet: Vegetarian
Description
These homemade cereal bars are a nutritious and delicious snack perfect for any time of day. Made with crispy rice cereal, rolled oats, and a binding mixture of honey and peanut butter, they offer a wholesome combination of flavors and textures. Optional add-ins like mini chocolate chips or dried fruit add a delightful twist, making these bars customizable and appealing to both kids and adults alike. Easy to prepare and perfect for meal prep, these bars are a great grab-and-go option for busy lifestyles.
Ingredients
Main Ingredients
- 3 cups crispy rice cereal or mixed whole-grain cereal
- 1 cup rolled oats
- ½ cup honey or maple syrup
- ½ cup peanut butter or almond butter
- 1 teaspoon vanilla extract
- ¼ teaspoon salt
Optional Add-ins
- ¼ cup mini chocolate chips or dried fruit
Instructions
- Prepare the baking dish: Line an 8×8-inch baking dish with parchment paper, making sure to leave some extra over the edges for easy removal of the bars later.
- Combine dry ingredients: In a large bowl, mix together the crispy rice cereal and rolled oats until well combined. Set aside.
- Make the binding mixture: In a small saucepan over low heat, stir together the honey (or maple syrup) and peanut butter until the mixture is smooth and well combined. Remove from heat and stir in the vanilla extract and salt to enhance the flavor.
- Mix wet and dry ingredients: Pour the peanut butter mixture over the cereal and oats, stirring gently but thoroughly until everything is evenly coated. If you’re including mini chocolate chips or dried fruit, fold them in at this stage, being careful not to crush them.
- Press mixture into dish: Transfer the combined mixture to the prepared baking dish. Use the back of a spoon or a spatula to press the mixture firmly and evenly into the pan to ensure the bars hold together when cut.
- Chill until firm: Refrigerate the dish for at least 1 hour to allow the bars to set properly. Once firm, lift the bars out of the dish using the parchment paper overhang and cut into 12 evenly sized bars.
Notes
- Use a nut-free butter alternative if you need a nut-free snack option.
- You can substitute honey or maple syrup with agave nectar for a different sweetness.
- Press the mixture firmly into the pan to ensure the bars hold together well after cutting.
- Store the bars in an airtight container in the refrigerator for up to one week for best freshness.
- Optional add-ins like nuts or seeds can be included for extra texture and nutrition.


