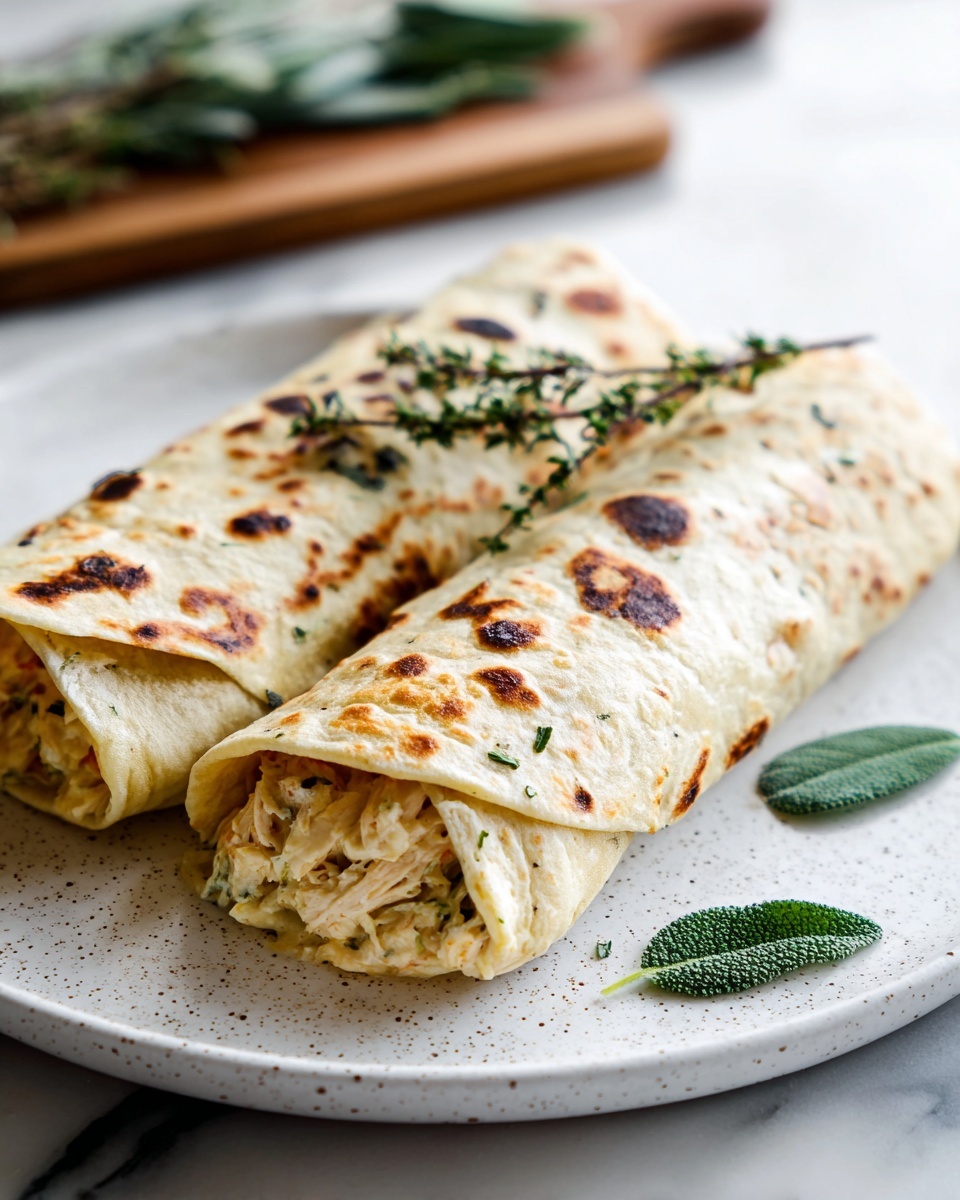
If you love rich, flavorful meals that feel indulgent yet are surprisingly easy to make, then you are going to adore this Cheesy Garlic Chicken Wraps Recipe. It brings together the comforting creaminess of roasted garlic-infused sauce, tender shredded chicken, and melty cheese all wrapped in a warm, crispy tortilla. Whether you’re looking for a satisfying lunch or a cozy dinner, this recipe turns simple ingredients into a crowd-pleasing delight that’s as delicious as it is inviting.
Ingredients You’ll Need
Each ingredient in this Cheesy Garlic Chicken Wraps Recipe plays a crucial role in creating layers of flavor and texture, making the final dish irresistibly creamy, savory, and satisfying. From the sweet softness of roasted garlic to the melty blend of cheddar and mozzarella cheese, every component brings something special to the table.
- 2 bulbs garlic: Roasting these softens their pungency and boosts their natural sweetness, giving the dish its signature garlicky depth.
- 1 tablespoon olive oil: Used to drizzle over the garlic before roasting, adding richness and helping it caramelize perfectly.
- Salt & pepper to taste: Essential for seasoning both the garlic before roasting and the sauce to bring out balanced flavors.
- 3 tablespoons butter: Melts smoothly into the sauce providing a velvety texture and richness.
- 2 tablespoons roasted garlic (from above): Mashed and blended into the sauce, these cloves pack in a gentle but unmistakable garlic punch.
- 1.5 cups heavy cream: Creates the luscious base for the garlic sauce, making it silky and indulgent.
- 1 teaspoon chicken powder: Enhances the savory flavor, deepening the chicken and garlic combination.
- Thyme & parsley (optional): Fresh herbs that add color, aroma, and a hint of brightness to balance the rich sauce.
- 2 cups shredded rotisserie chicken: Perfectly cooked meat that’s tender and juicy, soaking up all the creamy sauce.
- 3 large flour tortillas: The sturdy yet soft wraps that hold all the delicious fillings and crisp up beautifully when cooked.
- 1 cup shredded cheddar & mozzarella cheese: A combination that melts into gooey perfection, adding sharpness and creaminess.
How to Make Cheesy Garlic Chicken Wraps Recipe
Step 1: Roast the Garlic
Begin by preheating your oven to 350°F. Slice the tops off each garlic bulb just enough to expose the individual cloves. Drizzle them with olive oil and sprinkle with salt and pepper for seasoning. Wrap each bulb tightly in foil or place them in a mini cocotte, then roast for about 30 minutes until the cloves are tender, golden, and beautifully caramelized. This process mellows out the garlic’s sharpness, unlocking a rich, sweet flavor that’s the heart of this recipe.
Step 2: Prepare the Garlic Sauce
Once your roasted garlic has cooled enough to handle, squeeze the softened cloves out and mash them until they form a paste. In a skillet over medium heat, melt the butter and stir in the roasted garlic paste. Pour in the heavy cream and add the chicken powder for an extra savory boost. If you like, toss in some thyme and parsley at this stage for added freshness and color. Let the sauce gently simmer for 4 to 5 minutes, stirring occasionally until it thickens slightly into a rich, creamy base.
Step 3: Combine Chicken and Sauce
Season the garlic cream sauce with salt and pepper to taste. Then fold in the shredded rotisserie chicken, stirring until every piece is coated in that luscious sauce. Let it cook together just until the chicken is heated through—you want it warm, tender, and bursting with garlic-flavored goodness.
Step 4: Assemble the Wraps
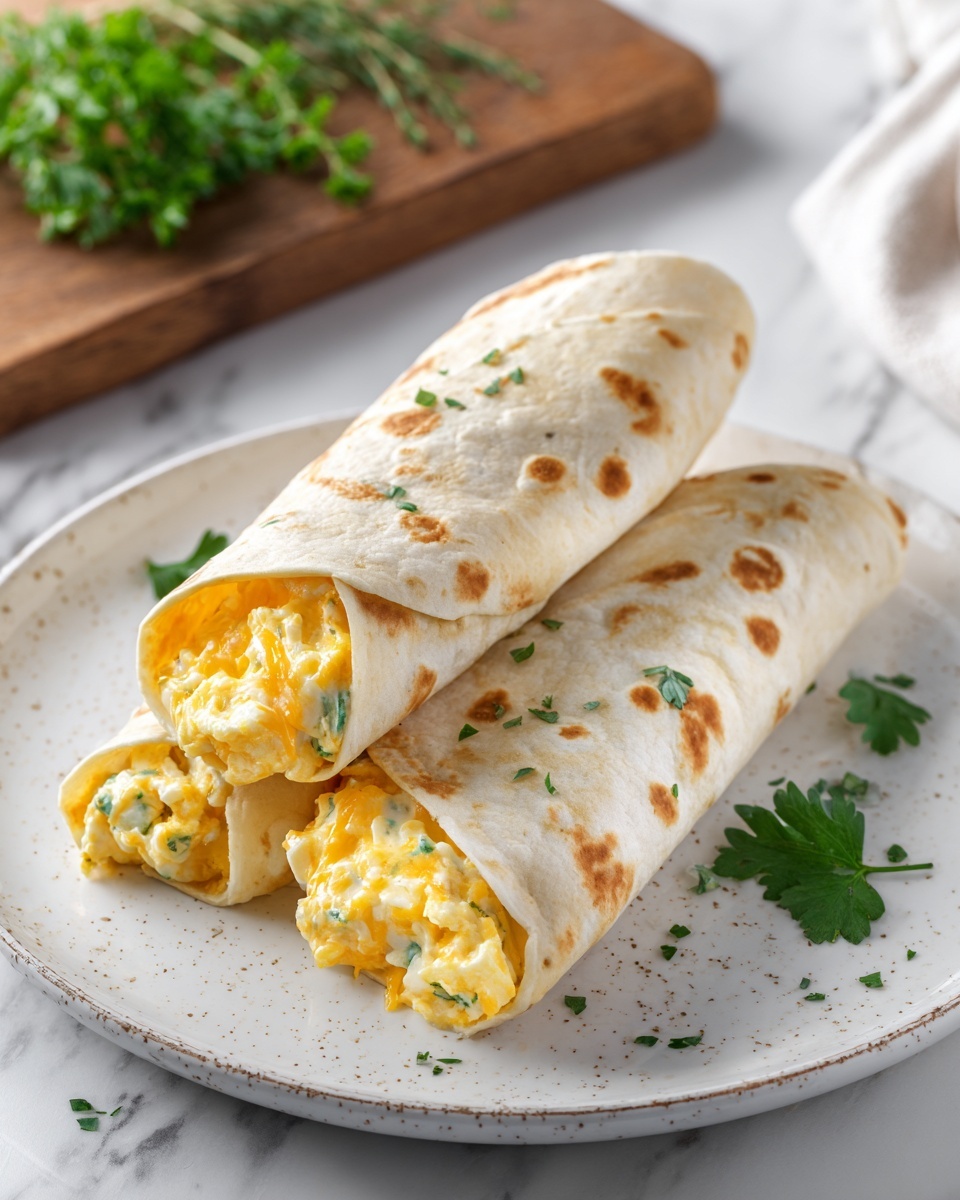
Grab one of your large flour tortillas and lay it flat on a clean surface. Spoon a generous helping of the creamy garlic chicken mixture right in the center. Next, sprinkle on a blend of shredded cheddar and mozzarella cheese to add that perfect gooey melt and sharp bite. This cheese blend not only tastes incredible but also helps hold everything together when cooked.
Step 5: Wrap and Cook
Roll the tortilla from the bottom up, tucking the filling in tightly to keep everything snug inside. Heat a little olive oil in a skillet over medium heat and place your wrap seam-side down. Cook for 2 to 3 minutes until the underside turns golden and crispy—that satisfying crunch is key! Carefully flip and cook the other side for another 2 to 3 minutes until it’s equally browned and the cheese inside has melted beautifully.
Step 6: Serve
Remove the wraps from the skillet and slice them in half if you prefer. Serve immediately while they’re hot, with the cheese still delightfully gooey and the garlicky aromas inviting everyone to dig in.
How to Serve Cheesy Garlic Chicken Wraps Recipe

Garnishes
A sprinkle of fresh parsley or chopped chives adds a pop of color and freshness that complements the rich, creamy filling wonderfully. For a touch of heat, a dash of crushed red pepper flakes or a drizzle of your favorite hot sauce can take these wraps to the next level. Don’t be afraid to get creative with fresh veggies like thinly sliced radishes or crisp lettuce for added texture and brightness.
Side Dishes
These wraps pair beautifully with simple sides that balance their richness. A crisp green salad with a tangy vinaigrette cuts through the creaminess, while some warm, seasoned sweet potato fries offer a sweet contrast that’s just as satisfying. If you want to keep things classic, a bowl of tomato soup or a light coleslaw will also complement the savory cheesy garlic flavors perfectly.
Creative Ways to Present
For a casual gathering, slice your Cheesy Garlic Chicken Wraps into bite-sized pinwheels—these make perfect finger food for parties or lunchboxes. You could also serve the filling over a bed of fresh greens, letting guests build their own wraps for a fun, interactive meal. Wrapping them in foil keeps these wraps warm and portable, ideal for picnics and road trips too.
Make Ahead and Storage
Storing Leftovers
Allow any leftover wraps to cool completely, then wrap them tightly in plastic wrap or store in an airtight container. They will keep well in the refrigerator for up to 3 days, maintaining plenty of flavor and moisture so you can enjoy them later without losing any of that cheesy garlic goodness.
Freezing
This recipe freezes wonderfully. Wrap each cooked wrap individually in foil and then place them inside a freezer-safe bag or container. They can be frozen for up to 2 months. Just be sure to thaw them overnight in the fridge for best texture and flavor upon reheating.
Reheating
For reheating, the skillet method works best to retain the wrap’s crispy exterior. Heat a little olive oil in a pan over medium heat and cook the wrap seam-side down until warmed through and crisp again. Alternatively, you can microwave it covered with a damp paper towel for 1 to 2 minutes, but the wrap won’t be as crunchy this way.
FAQs
Can I use fresh garlic instead of roasted garlic in this recipe?
Fresh garlic has a sharper, more pungent flavor than roasted, which is mellow and sweet. Using fresh garlic will change the sauce’s character significantly and might overpower the creamy base. Roasting garlic is key to achieving the signature flavor of this Cheesy Garlic Chicken Wraps Recipe.
What can I substitute for heavy cream if I want a lighter version?
You can substitute half-and-half or whole milk mixed with a bit of flour or cornstarch to help thicken the sauce. However, keep in mind the final result will be less rich and creamy. Using heavy cream is what gives the sauce its luxurious texture and mouthfeel.
Can I use other types of cheese instead of cheddar and mozzarella?
Absolutely! Feel free to experiment with cheeses like Monterey Jack, Gouda, or even pepper jack if you want some heat. Just choose cheeses that melt well to keep that ooey-gooey texture every bite deserves.
Is rotisserie chicken necessary, or can I use raw chicken?
Rotisserie chicken is a great shortcut because it’s already cooked and full of flavor, which speeds up the recipe. If using raw chicken, you’ll want to cook and shred it before mixing it into the sauce, adding a little time and effort but still deliciously doable.
Can this recipe be made gluten-free?
Yes! Simply swap out the flour tortillas for your favorite gluten-free wrap or large lettuce leaves for a low-carb option. The filling itself is naturally gluten-free, but always check all seasonings and powders to be sure.
Final Thoughts
There’s something truly special about this Cheesy Garlic Chicken Wraps Recipe that makes it a forever favorite in my kitchen. The combination of roasted garlic, creamy sauce, tender chicken, and melty cheese all wrapped up and crisped just right hits a perfect balance of comforting and crave-worthy. I can’t wait for you to try it and discover your own reasons to love this dish as much as I do!
Print
Cheesy Garlic Chicken Wraps Recipe
- Prep Time: 10 minutes
- Cook Time: 45 minutes
- Total Time: 55 minutes
- Yield: 4 servings
- Category: Main Course
- Method: Frying
- Cuisine: American
Description
Deliciously creamy and cheesy garlic chicken wraps made with tender shredded rotisserie chicken, roasted garlic-infused cream sauce, and melted cheddar-mozzarella cheese, all wrapped in a warm, crispy flour tortilla. Perfect for a comforting and satisfying meal any time of day.
Ingredients
Roasted Garlic
- 2 bulbs garlic
- 1 tablespoon olive oil
- Salt & pepper to taste
Garlic Cream Sauce
- 3 tablespoons butter
- 2 tablespoons roasted garlic (from above)
- 1.5 cups heavy cream
- 1 teaspoon chicken powder
- Thyme & parsley (optional)
- Salt & pepper to taste
Wrap Filling & Assembly
- 2 cups shredded rotisserie chicken
- 3 large flour tortillas
- 1 cup shredded cheddar & mozzarella cheese
- Olive oil (for cooking wraps)
Instructions
- Roast the garlic: Preheat your oven to 350°F. Slice the top off each garlic bulb to expose the cloves, drizzle with olive oil, and season with salt and pepper. Wrap the garlic in foil or place it in a mini cocotte. Roast for about 30 minutes until tender and golden. Allow it to cool completely.
- Prepare the garlic sauce: Once cooled, squeeze out the roasted garlic cloves and mash them into a smooth paste. Melt the butter in a skillet over medium heat, add the mashed roasted garlic, then pour in the heavy cream. Stir in the chicken powder and add thyme and parsley if desired. Let the sauce simmer gently for 4-5 minutes until it slightly thickens.
- Combine chicken: Season the garlic cream sauce with salt and pepper to taste. Fold in the shredded rotisserie chicken and cook together until the chicken is heated through and well coated with the sauce.
- Assemble the wraps: Lay a large flour tortilla flat on your work surface. Spoon a generous amount of the garlic chicken mixture into the center of the tortilla. Sprinkle the shredded cheddar and mozzarella cheese evenly over the filling.
- Wrap and cook: Tightly roll up the tortilla from the bottom, keeping the filling snug inside. Heat a little olive oil in a skillet over medium heat. Place the wrap seam-side down in the skillet and cook for 2-3 minutes until golden and crispy. Flip carefully and cook the other side for another 2-3 minutes until crisp and warmed through.
- Serve: Remove the wrap from the skillet. Slice in half if desired, and serve hot for a rich, cheesy, and garlicky meal.
Notes
- You can substitute rotisserie chicken with leftover cooked chicken or shredded roasted chicken.
- For a lighter version, use half-and-half instead of heavy cream, but the sauce will be less rich.
- Adding fresh thyme and parsley is optional but enhances the flavor profile with herbaceous notes.
- Ensure the wrap is tightly rolled to prevent the filling from falling out while cooking.
- Use a non-stick or cast iron skillet for best crisping results when pan-frying the wraps.
