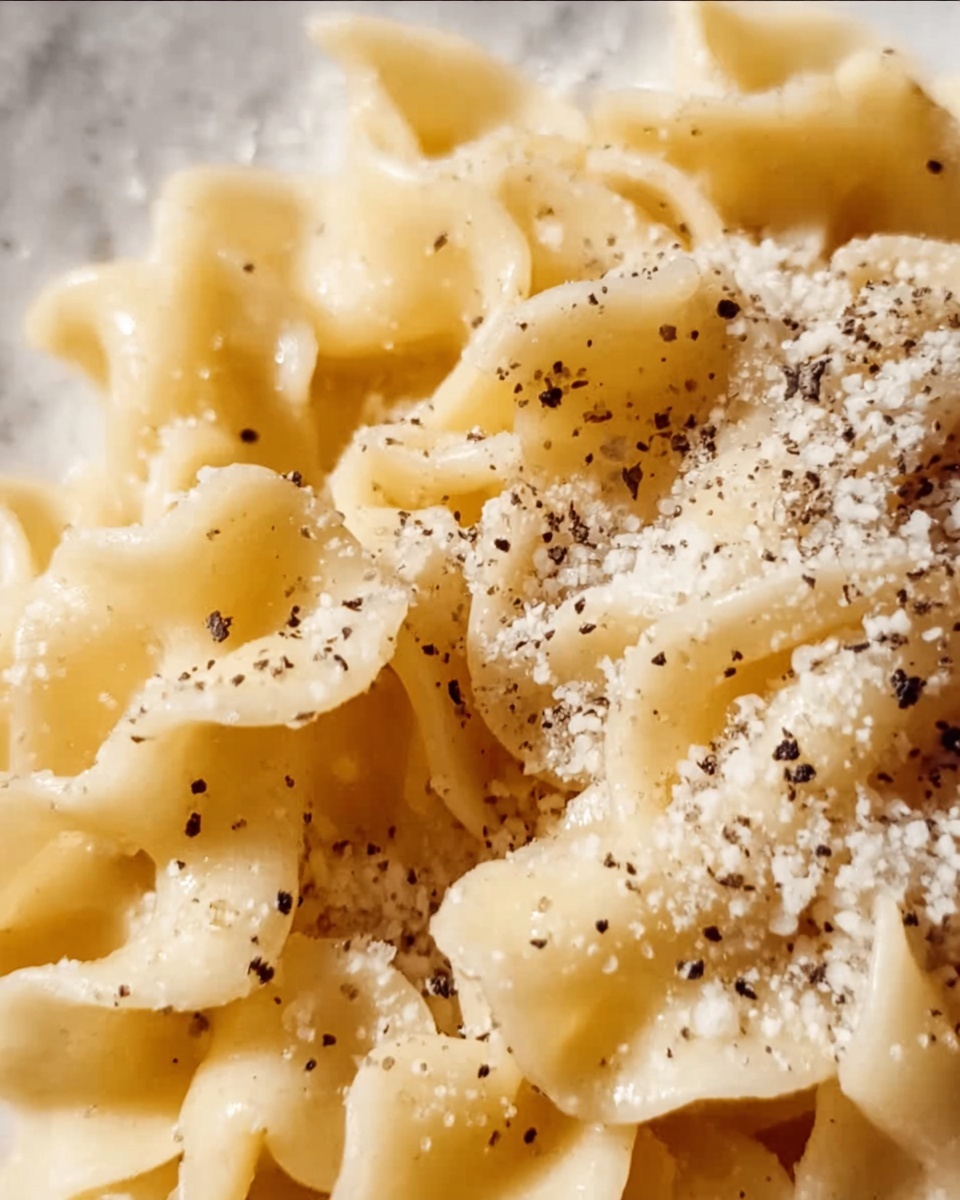
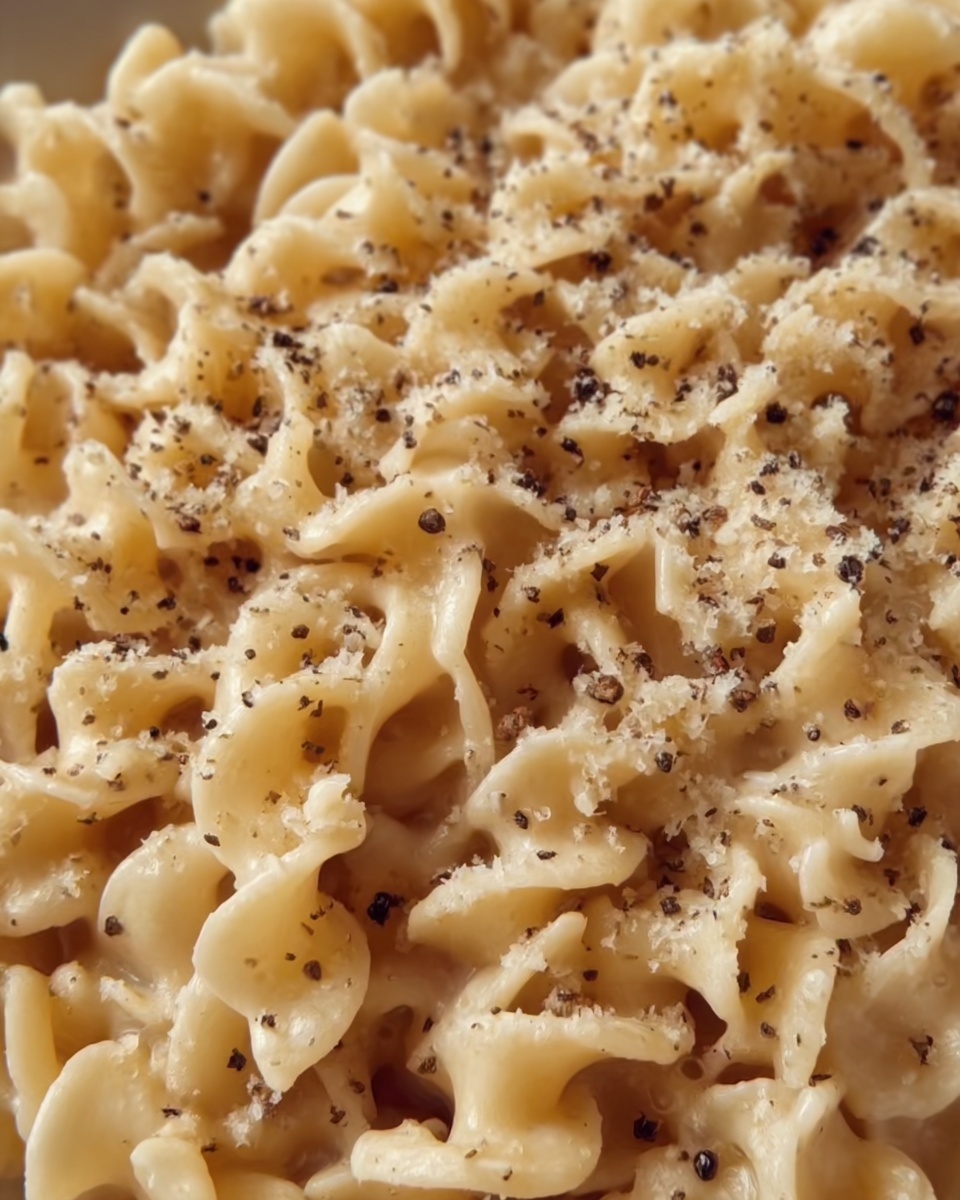
If you’re craving a comforting pasta dish that feels like a warm hug in every bite, you’re going to fall head over heels for this Creamy Cavatappi Recipe. It’s the perfect blend of tender, spiraled cavatappi pasta enveloped in a luscious, cheesy sauce that’s rich yet balanced with just the right hint of garlic and spice. Whether you’re cooking a quick weeknight dinner or impressing friends, this recipe offers something truly special — creamy, dreamy, and endlessly satisfying.
Ingredients You’ll Need
This recipe keeps things delightfully simple, involving straightforward ingredients that each play a crucial role in crafting that velvety texture and bold flavor. Every single component contributes to the perfect harmony of taste, mouthfeel, and color that makes this dish a standout.
- 12 ounces cavatappi pasta: The spiral shape grabs onto sauce beautifully, ensuring each bite is coated with cheesy goodness.
- 2 tablespoons unsalted butter: Adds richness and a silky base for the sauce.
- 3 cloves garlic (minced): Infuses the sauce with aromatic warmth without overpowering.
- 2 tablespoons all-purpose flour: Helps to thicken the sauce into a creamy consistency.
- 2 cups whole milk: Provides a smooth, creamy body to the sauce.
- 1 cup heavy cream: Elevates the richness to luxurious levels.
- 1 cup freshly grated Parmesan cheese: Brings salty, nutty depth and melts perfectly.
- 1/2 cup shredded mozzarella cheese: Adds gooey stretch and mild flavor.
- 1/2 teaspoon salt: Essential to enhance and balance all flavors.
- 1/4 teaspoon black pepper: Adds subtle heat and complexity.
- 1/4 teaspoon crushed red pepper flakes (optional): For those who like a playful kick of spice.
- Chopped parsley for garnish (optional): A fresh pop of color and brightness to finish the dish.
How to Make Creamy Cavatappi Recipe
Step 1: Cooking the Pasta
Start by bringing a large pot of salted water to a boil. This is important because the salt seasons the pasta from the inside out. Cook your cavatappi until it’s al dente, meaning it still has a little bite to it — this texture holds up perfectly once tossed with the creamy sauce. Drain it well and set it aside while you prepare the sauce.
Step 2: Making the Roux
In a large skillet or saucepan, melt your butter over medium heat. Once melted, add the minced garlic and sauté it for about 30 seconds until fragrant; this step ensures the garlic flavor is delicate yet noticeable. Next, whisk in the all-purpose flour and cook for a full minute. This creates a roux, which is the classic base for thickening creamy sauces without lumps.
Step 3: Building the Sauce
Slowly pour in the whole milk and heavy cream while continuously whisking. This slow addition and constant whisking keep the sauce silky and prevent any clumps from forming. Bring everything to a gentle simmer and let it thicken, about 3 to 4 minutes. The sauce should coat the back of a spoon, giving you that luscious texture you’re after.
Step 4: Adding the Cheeses and Seasoning
Once thickened, stir in the freshly grated Parmesan and shredded mozzarella, making sure they melt smoothly into the sauce. The Parmesan delivers that sharp, nutty taste, while the mozzarella adds incredible gooeyness. Season with salt, black pepper, and red pepper flakes if you like a bit of heat. Taste and adjust accordingly—seasoning is key to bringing out those vibrant flavors.
Step 5: Combining Pasta and Sauce
Finally, add the cooked cavatappi back into the sauce and toss everything together so each spiral is generously coated. Let it cook another 1 to 2 minutes to ensure the dish is heated through and perfectly melded. This step ensures every bite offers that creamy, cheesy experience that makes this Creamy Cavatappi Recipe so irresistible.
How to Serve Creamy Cavatappi Recipe

Garnishes
A sprinkle of chopped parsley adds a beautiful, fresh green contrast to the rich creaminess, lifting the entire dish visually and flavor-wise. You can also add a light dusting of extra Parmesan or a few more red pepper flakes if you prefer a spicier finish.
Side Dishes
This dish pairs wonderfully with crisp, green salads or steamed vegetables like broccoli or asparagus to balance the richness. Garlic bread or crusty baguette makes for fantastic dipping companions, letting you savor every last bit of the cheesy sauce.
Creative Ways to Present
You can bake this creamy pasta with a golden crust of breadcrumbs and extra mozzarella for a delightful twist on the original stovetop version. Alternatively, stuffing bell peppers with this scrumptious pasta and baking them adds a colorful and fun presentation that’s sure to impress your family or guests.
Make Ahead and Storage
Storing Leftovers
Leftover Creamy Cavatappi holds up well in the fridge for up to 3 days. Store it in an airtight container to maintain moisture and prevent the sauce from drying out.
Freezing
You can freeze portions of this dish, but due to the cream and cheese content, slight texture changes may occur. Freeze in a freezer-safe container or heavy-duty bag for up to 2 months. Thaw overnight in the fridge before reheating for best results.
Reheating
When reheating, warm your creamy pasta gently on the stovetop or in the microwave with a splash of milk to revive that silky sauce. Stir frequently to prevent the sauce from separating, and your dish will taste just as delightful as fresh.
FAQs
Can I use a different type of pasta for this Creamy Cavatappi Recipe?
Absolutely! While cavatappi’s ridges and spirals catch sauce beautifully, other shapes like penne, rotini, or shells work just as well to hold the creamy cheese sauce.
Is there a lighter version of this recipe?
You can substitute heavy cream with half-and-half or even whole milk only, but keep in mind the sauce may be less rich and creamy. Reducing cheese slightly also helps lower fat without sacrificing too much flavor.
How can I make this dish vegetarian-friendly?
This recipe is naturally vegetarian since it contains no meat. Just be sure to use vegetarian-friendly cheeses that don’t contain animal rennet to keep it fully vegetarian.
Can I add protein to this Creamy Cavatappi Recipe?
Definitely! Adding cooked chicken, crispy bacon, or sautéed mushrooms boosts the heartiness and flavor. Simply stir them in with the pasta before serving.
What is the best way to avoid lumpy sauce?
Whisking constantly while slowly adding the milk and cream to the roux is crucial. This steady incorporation prevents lumps from forming and creates a smooth, creamy sauce every time.
Final Thoughts
There’s something truly magical about the way simple ingredients come together to create the perfect bowl of creamy, cheesy pasta. This Creamy Cavatappi Recipe is one of those dishes that feels special yet is so easy and quick to whip up. I encourage you to give it a try — it’s the kind of recipe that soon becomes a beloved staple in your kitchen, guaranteed to bring smiles and full hearts every time you serve it.
Print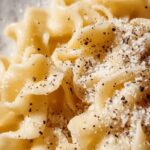
Creamy Cavatappi Recipe
- Prep Time: 10 minutes
- Cook Time: 20 minutes
- Total Time: 30 minutes
- Yield: 4 servings
- Category: Main Course
- Method: Stovetop
- Cuisine: Italian-American
- Diet: Vegetarian
Description
Creamy Cavatappi is a rich and comforting Italian-American pasta dish featuring tender cavatappi noodles enveloped in a luscious homemade cheese sauce made from Parmesan, mozzarella, and a creamy blend of milk and heavy cream. Enhanced with garlic and subtle spices, this easy-to-make stovetop recipe offers a perfect weeknight meal that’s both flavorful and satisfying.
Ingredients
Pasta
- 12 ounces cavatappi pasta
Sauce
- 2 tablespoons unsalted butter
- 3 cloves garlic, minced
- 2 tablespoons all-purpose flour
- 2 cups whole milk
- 1 cup heavy cream
- 1 cup freshly grated Parmesan cheese
- 1/2 cup shredded mozzarella cheese
- 1/2 teaspoon salt
- 1/4 teaspoon black pepper
- 1/4 teaspoon crushed red pepper flakes (optional)
Garnish
- Chopped parsley (optional)
Instructions
- Cook Pasta: Bring a large pot of salted water to a boil and cook the cavatappi pasta until al dente according to package instructions, typically 9-11 minutes. Drain and set aside.
- Prepare Roux: In a large skillet or saucepan, melt the unsalted butter over medium heat. Add the minced garlic and sauté for about 30 seconds until fragrant, taking care not to brown the garlic.
- Make Sauce Base: Whisk in the all-purpose flour to the melted butter and garlic. Cook for about 1 minute, stirring constantly, to form a roux which helps thicken the sauce.
- Add Dairy: Slowly pour in the whole milk and heavy cream while whisking continuously to prevent lumps. Bring this mixture to a gentle simmer and continue cooking for 3 to 4 minutes until the sauce begins to thicken slightly.
- Incorporate Cheese: Stir in the freshly grated Parmesan and shredded mozzarella cheese into the thickened sauce. Mix until the cheeses melt completely and the sauce becomes smooth and creamy.
- Season Sauce: Add salt, black pepper, and crushed red pepper flakes if using. Taste and adjust seasoning as needed.
- Combine Pasta and Sauce: Add the cooked cavatappi pasta to the sauce, tossing gently to coat every piece evenly. Continue cooking for an additional 1 to 2 minutes to heat through and help the pasta absorb the flavors.
- Serve: Remove from heat and serve the creamy cavatappi warm, garnished with chopped parsley if desired.
Notes
- For added protein, stir in cooked chicken, bacon, or sautéed mushrooms along with the pasta.
- Use half-and-half instead of heavy cream for a lighter version of the sauce.
- This dish reheats well; add a splash of milk when reheating to maintain sauce creaminess.


