“`html
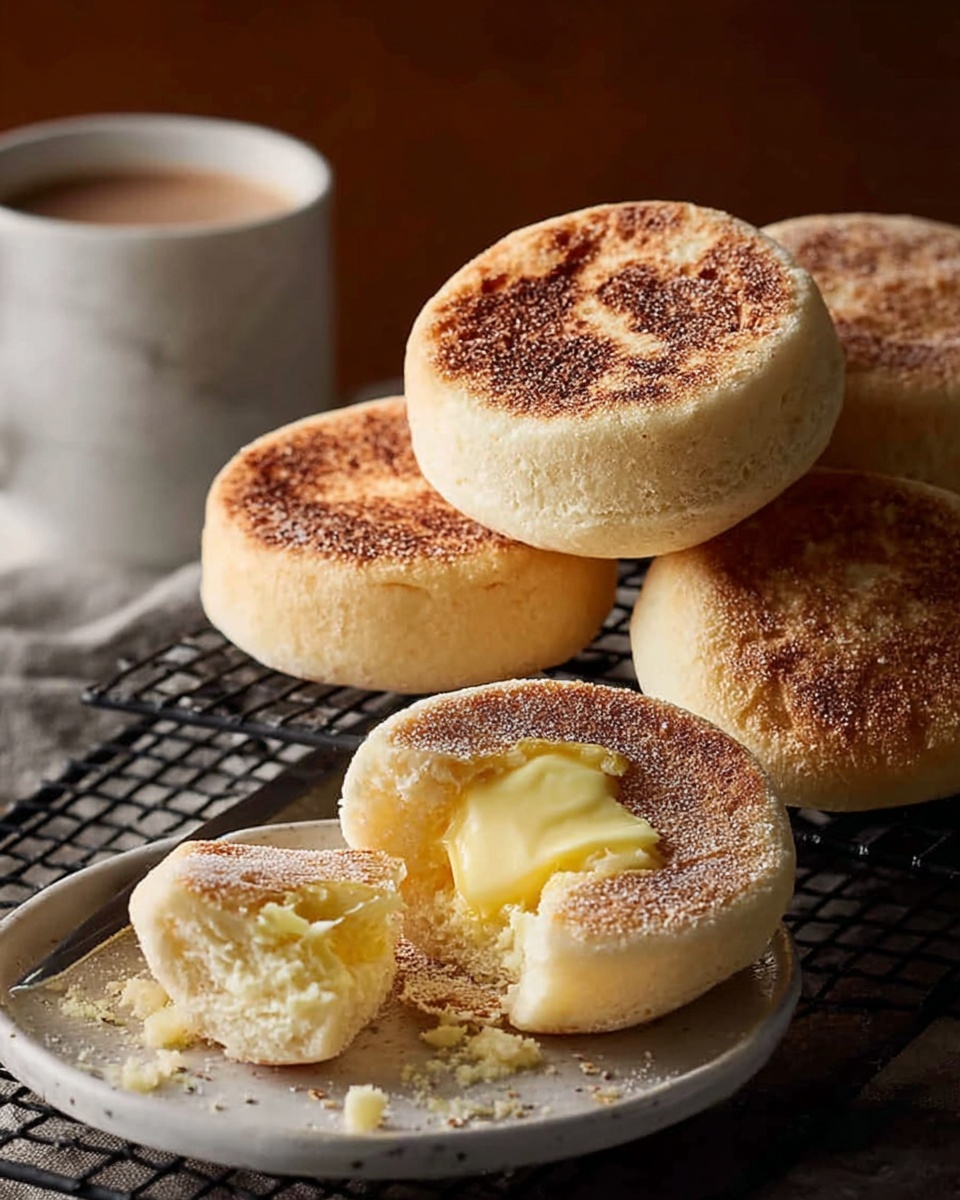
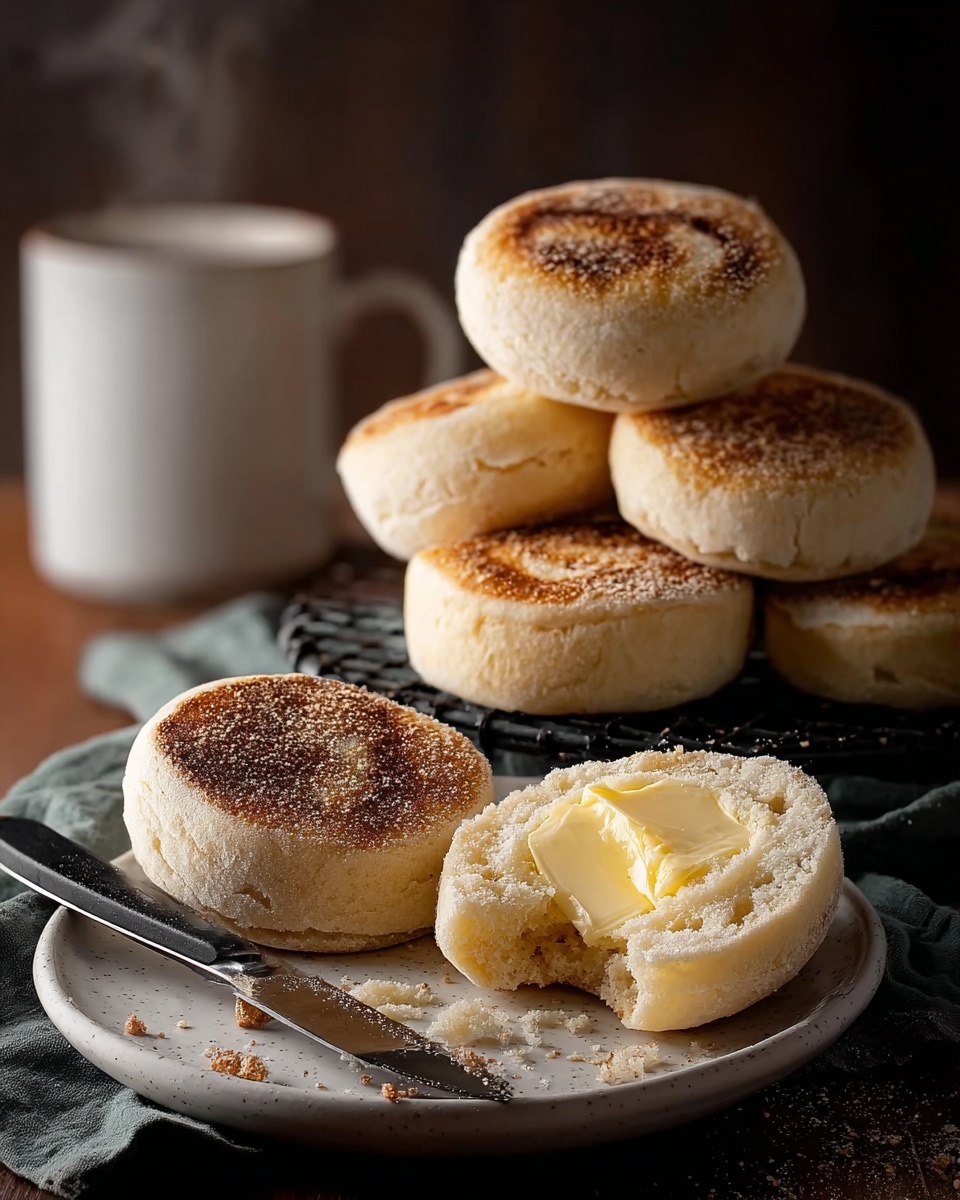
There is something truly magical about biting into a warm, fluffy English muffin that you made yourself. This Homemade English Muffins Recipe delivers that classic nooks-and-crannies texture paired with a subtle tenderness that only a fresh muffin can offer. From the slightly tangy crumb to that golden crust dusted with cornmeal, every bite is a comforting hug that elevates any breakfast or snack. Once you try making these at home, you’ll wonder why you ever settled for store-bought versions.
Ingredients You’ll Need
Making these muffins is delightfully simple because you only need a handful of basic ingredients—each chosen specifically to ensure the perfect texture, flavor, and color of your muffins.
- All-Purpose Flour: The foundation that provides structure and chewiness to your muffins.
- Active Dry Yeast: Essential for that airy rise and lightness in every bite.
- Sugar: Adds just a whisper of sweetness to balance the tanginess.
- Salt: Enhances all the flavors and keeps the dough balanced.
- Milk: Contributes tenderness and richness to the dough.
- Butter: Melted butter enriches the batter with smooth, buttery notes.
- Warm Water: Helps activate the yeast for a perfect rise.
- Cornmeal: Sprinkled on the cooking surface for that classic crunchy crust and prevents sticking.
- Baking Soda: A subtle leavening boost that contributes to texture and rise.
- Egg: Adds moisture and binds the dough beautifully.
- White Vinegar: A small addition that gently enhances the muffins’ tenderness and flavor complexity.
How to Make Homemade English Muffins Recipe
Step 1: Warm Your Skillet
Start by warming your skillet or griddle over low heat. This gentle warming is the perfect setup as your dough proofs, ensuring the pan is ready to cook your muffins evenly without burning.
Step 2: Activate the Yeast
In a large bowl, whisk together warm water, warm milk, sugar, and active dry yeast. Let this mixture sit until it becomes frothy, about 5 to 10 minutes. That foamy surface signals the yeast is alive and ready to give your muffins their lovely rise.
Step 3: Combine Ingredients Into Dough
Add the melted butter, egg, and white vinegar to your yeast mixture. Gradually mix in flour and salt, stirring until a sticky dough forms. The texture here should be tacky but manageable—this is what will translate into tender but sturdy muffins.
Step 4: Prepare the Cooking Surface
Lightly oil your warmed skillet or griddle, then generously sprinkle cornmeal on the surface. The cornmeal’s coarseness not only keeps the muffins from sticking but creates that signature crispy base with a bit of tooth.
Step 5: Let the Dough Rise
Cover your bowl with a clean kitchen towel and let the dough rest in a warm spot for about 1½ hours. This slow rise allows the yeast to develop flavor and texture. Once risen, turn the dough onto a floured surface and divide it into 8 to 10 equal pieces.
Step 6: Shape and Coat Muffins
Shape each piece into a disc, then coat each side lightly with cornmeal. This extra step enhances the distinctive texture and prevents sticking as they cook.
Step 7: Cook the Muffins
Place the dough discs on your prepared skillet over low heat. Cover the pan and cook each side for 7 to 8 minutes until they turn a warm golden brown. Cooking slowly at low heat ensures the muffins cook through without burning while developing their signature crust.
Step 8: Cool and Fork-Split
Transfer the muffins onto a wire rack to cool. Once cool enough to handle, split them gently using a fork instead of slicing with a knife. This method preserves the charming nooks and crannies that make English muffins so deliciously textured.
Step 9: Enjoy!
Toast, butter, jam, or turn these muffins into hearty sandwiches—your freshly made English muffins are ready to shine any way you please!
How to Serve Homemade English Muffins Recipe
Garnishes
Freshly toasted muffins are fantastic topped simply with butter and honey or your favorite jam. For a savory twist, spread creamy avocado or a thick layer of cream cheese with smoked salmon for an elegant bite that impresses every time.
Side Dishes
Pair your homemade English muffins with scrambled eggs, crisp bacon, or a bowl of fresh fruit to create the perfect balanced breakfast. They’re also lovely alongside a hearty bowl of soup or salad for a cozy lunch or light dinner.
Creative Ways to Present
Beyond toast, split and fill your muffins with layers of ham, cheese, and sautéed veggies for a quick yet satisfying sandwich. You can also use them as a base for mini eggs Benedict or even as a platform for sweet toppings like nut butters and sliced bananas for a guilt-free treat.
Make Ahead and Storage
Storing Leftovers
If you have any muffins left, store them in an airtight container at room temperature for up to 2 days. This keeps them soft and delicious, so they’re ready to be enjoyed without losing their fresh-baked charm.
Freezing
To keep your Homemade English Muffins Recipe handy, freeze cooled muffins in a sealed freezer bag for up to 3 months. Just thaw overnight in the fridge or pop them straight into the toaster for a fresh-from-the-oven taste any time you want.
Reheating
The best way to enjoy your muffins later is to toast them or warm them gently in a skillet with a touch of butter. This revives the crisp edges and warm softness inside, making every bite taste like it just came from your kitchen.
FAQs
Can I use whole wheat flour instead of all-purpose?
Absolutely! Replacing all-purpose flour with whole wheat will give your muffins a heartier flavor and denser texture. You might want to start with half whole wheat and half all-purpose to keep them light yet wholesome.
Is it necessary to fork-split the muffins?
Yes! Using a fork to split the muffins preserves those signature nooks and crannies that trap butter and jam so wonderfully. Slicing with a knife can crush this delicate texture.
Why do we use vinegar in this recipe?
The vinegar helps tenderize the dough and enhances the flavor complexity slightly by balancing the sweetness and supporting the rise alongside the yeast.
Can I make these muffins without a skillet or griddle?
A heavy-bottomed pan works well too. The key is cooking over low heat to ensure even cooking and that perfect golden crust without burning.
How long can I proof the dough for this recipe?
The dough needs about 1½ hours to rise properly. Longer proofing can make the dough more sour and fragile, so sticking to this time frame ensures perfect muffins every time.
Final Thoughts
There is nothing quite like the pride and joy of creating your own Homemade English Muffins Recipe from scratch. These muffins bring a warmth and comfort to the table that’s hard to beat, perfect for lazy weekend mornings or a special brunch with friends and family. Trust me, once you get the hang of this recipe, your mornings will never be the same. So grab your skillet, gather your ingredients, and start baking your way to muffin bliss!
“`
Print
Homemade English Muffins Recipe
- Prep Time: 15 minutes
- Cook Time: 16 minutes
- Total Time: 2 hours 1 minute
- Yield: 8-10 English muffins
- Category: Breakfast
- Method: Stovetop
- Cuisine: British
- Diet: Vegetarian
Description
This classic English Muffin recipe yields soft, fluffy, and lightly crisped muffins perfect for toasting and enjoying with butter, jam, or your favorite sandwich fillings. Made using a simple yeast dough, these muffins are cooked on the stovetop skillet, giving them their signature nooks and crannies and golden crust.
Ingredients
Dry Ingredients
- 3½ cups All-Purpose Flour
- 2¼ teaspoons Active Dry Yeast
- 1 tablespoon Sugar
- 1 teaspoon Salt
- ½ teaspoon Baking Soda
Wet Ingredients
- 1 cup Warm Milk
- ½ cup Warm Water
- 2 tablespoons Butter, melted
- 1 large Egg
- 1 teaspoon White Vinegar
Other
- Cornmeal, for dusting and coating
Instructions
- Warm the skillet or griddle: Begin by warming your skillet or griddle over low heat. This step ensures the pan will be ready once the dough has finished proofing.
- Proof the yeast: In a mixing bowl, combine the warm water, warm milk, sugar, and active dry yeast. Allow the mixture to sit until it becomes frothy and bubbly, indicating that the yeast is active.
- Make the dough: To the yeast mixture, add the melted butter, egg, white vinegar, flour, baking soda, and salt. Mix together until a sticky dough forms, ensuring all ingredients are well incorporated.
- Prepare the cooking surface: Lightly oil your skillet or griddle and sprinkle it with cornmeal to prevent sticking and give the muffins their signature texture.
- Proof the dough: Cover the dough and let it rise in a warm place for about 1½ hours, or until it has doubled in size.
- Shape the muffins: Divide the risen dough into 8 to 10 equal pieces. Shape each piece into a disc and coat both sides with cornmeal for texture and ease of cooking.
- Cook the muffins: Place the dough discs onto the warmed skillet over low heat. Cover and cook for 7–8 minutes per side, or until each side is golden brown and cooked through.
- Cool and finish: Transfer the cooked muffins to a wire rack to cool. Once cooled, fork-split the muffins to create the traditional nooks and crannies texture that holds butter and spreads beautifully.
- Serve: Toast the muffins as desired and enjoy with your favorite spreads, or use them as sandwich buns.
Notes
- Use warm liquids to activate the yeast but avoid temperatures above 120°F to prevent killing the yeast.
- Fork-splitting the muffins after cooling helps achieve the characteristic texture of English muffins.
- The low and slow cooking on the skillet is key to cooking the muffins fully without burning.
- These can be stored in an airtight container for up to 3 days or frozen for longer storage.


