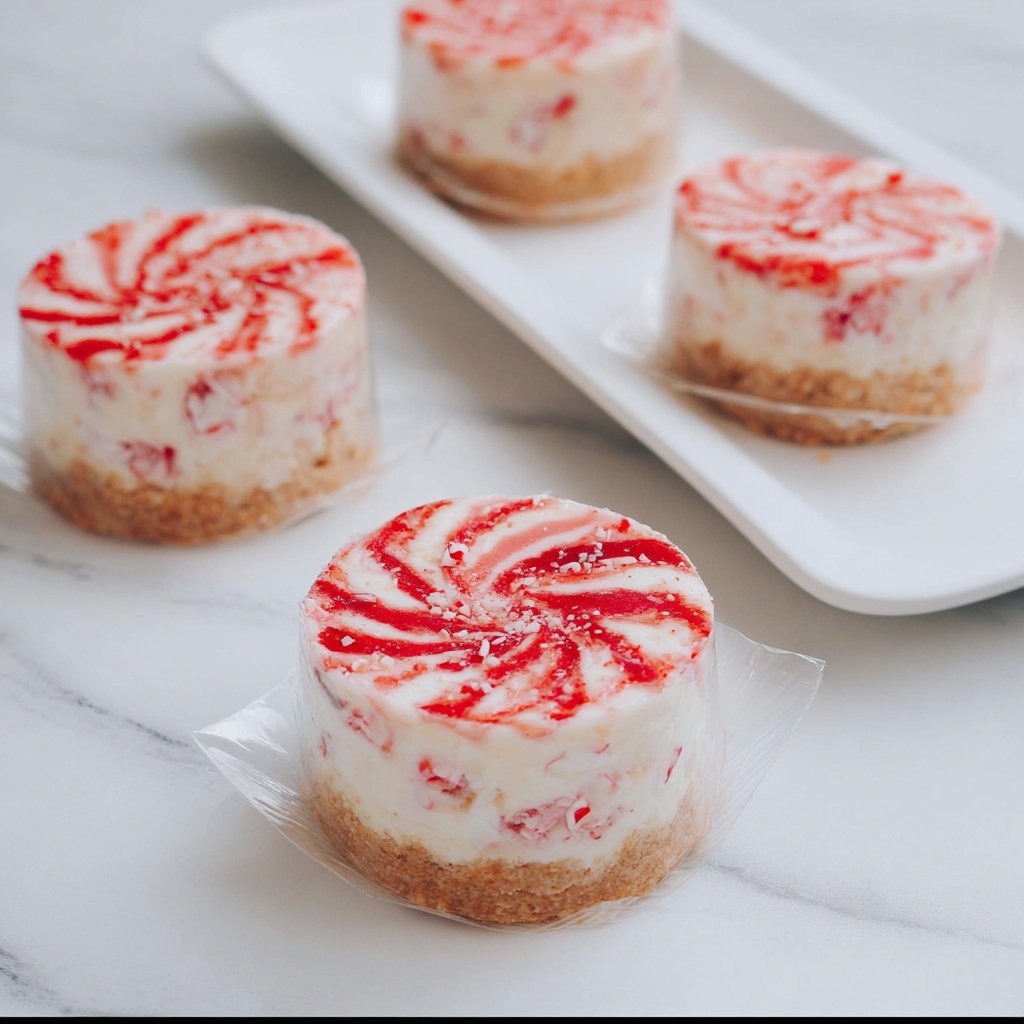
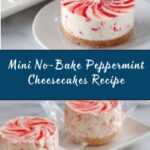
If you’re craving a festive, refreshing dessert that feels as joyful as a holiday celebration, the Mini No-Bake Peppermint Cheesecakes Recipe is exactly what you need. These delightful little cheesecakes combine a buttery cookie crust with a luscious white chocolate and cream cheese filling, all infused with the cool crunch of peppermint candy. Best of all, they require no baking, offering you a fun and fuss-free way to serve up elegant, bite-sized treats that everyone will adore.
Ingredients You’ll Need
This recipe keeps things wonderfully simple but packs a punch in flavor and texture. Each ingredient plays a special role, from the cookie crumbs that form a perfect base, to the peppermint candy pieces that add a signature festive zing.
- 2 ½ cups cookie crumbs: Choose shortbread, butter cookies, sugar cookies, animal crackers, or graham crackers for a buttery and crunchy crust.
- 4 tablespoons butter: Melted and mixed with cookie crumbs, this binds the crust wonderfully while adding richness.
- 2/3 cup cream: Heated with white chocolate to create a silky, smooth filling base.
- 12 ounces white chocolate, chopped: Provides sweetness and creaminess, melting into the cream for a luscious texture.
- 4 8-ounce packages cream cheese, softened: The star of the cheesecake, offering a tangy and creamy foundation.
- ½ cup butter, softened: Adds smoothness and helps achieve that perfect cheesecake consistency.
- 2/3 cup powdered sugar: Sweetens without grit and blends seamlessly.
- 2 teaspoons vanilla extract: Brings warmth and depth to the flavor profile.
- 1 10-ounce bag Andes Peppermint Crunch candy pieces: The festive peppermint surprise that gives every bite a cool and crunchy finish.
- Red decorating sugar: For that extra sparkle and to decorate with a beautiful starlight mint pattern.
- Plastic wrap: To neatly wrap each cheesecake for freshness and presentation.
- 12 silicone muffin liners (1 cup size): Essential for easy shaping and removal without mess.
How to Make Mini No-Bake Peppermint Cheesecakes Recipe
Step 1: Prepare the Crust
Start by melting 4 tablespoons of butter and mixing it thoroughly into your cookie crumbs until every piece is coated. Press this mixture evenly into the bottom of your muffin cups. If you’re working with silicone muffin tins, pop them in the microwave for 1 minute to help the crust set firmly. Alternatively, if you prefer using metal pans, bake the crust at 350 degrees for 10 minutes to achieve a delightful crisp base.
Step 2: Melt the White Chocolate and Cream
In a microwave-safe bowl, combine the cream and chopped white chocolate and heat on 50% power for 1 minute. Stir well to blend the chocolate into the cream, then heat in 30-second increments as needed until completely smooth. Be gentle and patient here—you want that perfect glossy texture without burning your chocolate.
Step 3: Make the Cheesecake Filling
While your chocolate is melting, use an electric mixer at medium speed to beat together the softened cream cheese and butter until creamy and smooth. Then add powdered sugar, vanilla extract, and your melted white chocolate mixture, beating on medium-high speed for about three minutes. This step ensures your filling is perfectly smooth and irresistibly fluffy.
Step 4: Add the Peppermint Crunch
Gently fold in the Andes Peppermint Crunch candy pieces, distributing that signature peppermint magic throughout the filling. Pour the mixture into your prepared muffin cups, smoothing the tops for a neat finish.
Step 5: Chill Until Firm
Place your mini cheesecakes in the refrigerator for at least 3 hours to set properly. If you’re eager to serve sooner, freezing them for about an hour will also do the trick, giving you a faster, cool refreshment.
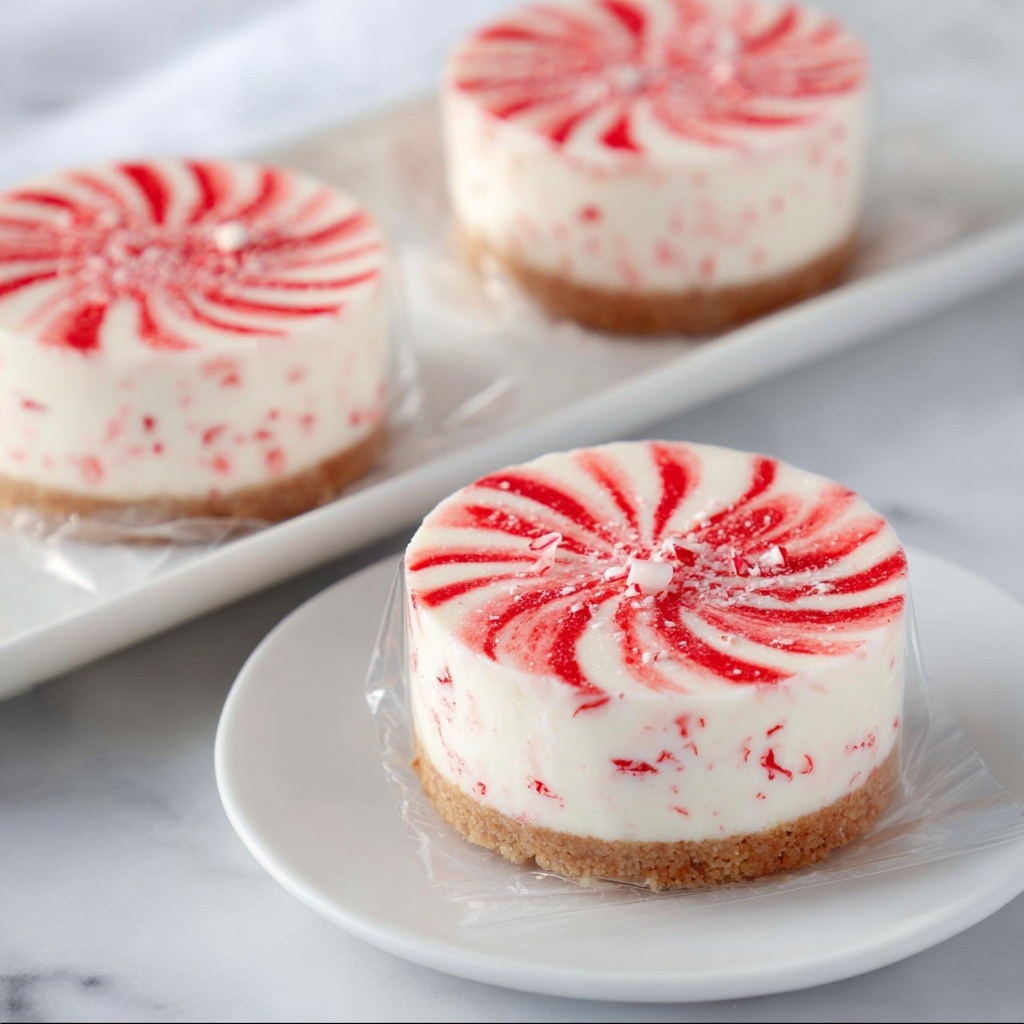
Step 6: Create the Starlight Mint Pattern
Cut a paper circle the size of one muffin cup and draw curved lines radiating from near the center to the edge, creating a star pattern. Cut along these lines to make a stencil. Pop your cheesecakes out of the silicone cups and place them on a cookie sheet to catch excess sugar. Position the stencil over each cheesecake and sprinkle red decorating sugar on top for a festive and elegant touch.
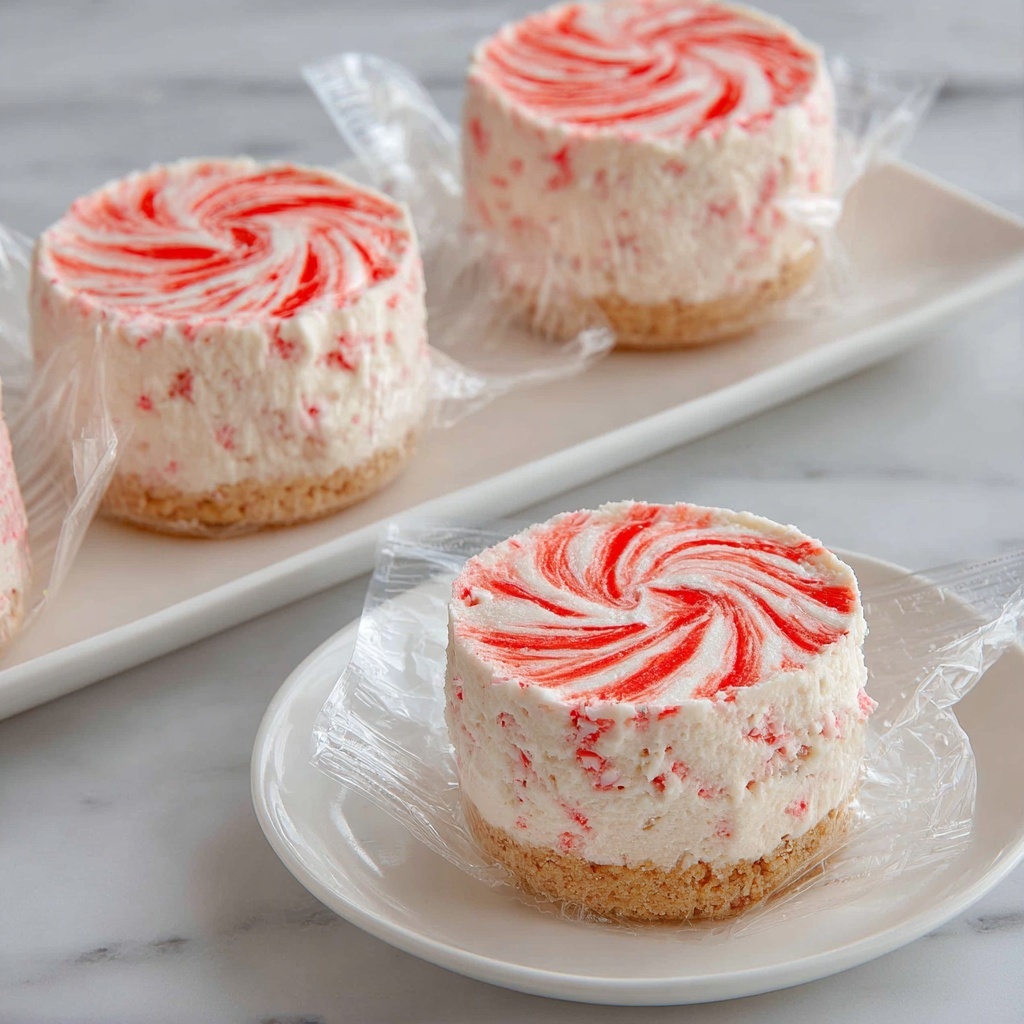
Step 7: Wrap and Store
Tear off 2-inch strips of plastic wrap and carefully wrap each cheesecake, twisting and trimming the ends for a polished look. This helps maintain freshness and makes them easy to transport or gift.
How to Serve Mini No-Bake Peppermint Cheesecakes Recipe
Garnishes
The beauty of this Mini No-Bake Peppermint Cheesecakes Recipe is how easily you can dress it up. Sprinkle extra crushed peppermint candies or a light dusting of cocoa powder for contrast. Fresh mint leaves also pair nicely, enhancing the peppermint flavor while adding a pop of green.
Side Dishes
Consider serving these cheesecakes alongside a cup of hot cocoa or a spiced latte to complement the cool peppermint notes. A fresh fruit salad with red and green fruits like strawberries and kiwi makes for a colorful and healthy accompaniment.
Creative Ways to Present
For gifting or parties, arrange the mini cheesecakes on a decorative platter lined with holiday-themed doilies. Try presenting them in individual clear boxes tied with a festive ribbon—it’s a charming way to share this Mini No-Bake Peppermint Cheesecakes Recipe with friends and family.
Make Ahead and Storage
Storing Leftovers
Store any leftover mini cheesecakes in an airtight container in the refrigerator. They will keep beautifully for up to five days, allowing you to enjoy their creamy peppermint goodness all week long.
Freezing
If you want to prepare these ahead of time or save extras, freezing is a fantastic option. Wrap each cheesecake individually in plastic wrap and place them in a freezer-safe container or bag. They’ll keep well for up to one month. When ready to eat, thaw in the refrigerator overnight for best texture.
Reheating
Since these cheesecakes are best enjoyed chilled, reheating is not recommended. Instead, allow frozen cheesecakes to thaw naturally in the refrigerator. This preserves the creamy texture and fresh peppermint flavor perfectly.
FAQs
Can I use regular chocolate instead of white chocolate?
While you can substitute regular chocolate, white chocolate complements the peppermint flavor beautifully and keeps the filling light and creamy. Using dark or milk chocolate will change the taste and texture noticeably.
Do I need silicone muffin liners, or can I use regular muffin tins?
Silicone liners make it easier to pop out the cheesecakes without cracking. If using metal muffin tins, line them with paper liners or lightly grease them and follow the baking step for the crust to set properly.
What peppermint candies work best?
Andes Peppermint Crunch pieces are perfect because they’re small, crunchy, and melt subtly into the filling. You can also use crushed candy canes or peppermint baking chips if you prefer.
Can I make these cheesecakes vegan or dairy-free?
This recipe relies heavily on cream cheese and butter, so substitutions would need some experimentation. Vegan cream cheese and dairy-free white chocolate alternatives exist, but results may vary in texture and flavor.
How long do these mini cheesecakes take to set?
An ideal chill time is at least 3 hours in the refrigerator. If you’re short on time, placing them in the freezer for about 1 hour can speed up the process, though longer chilling ensures the best texture.
Final Thoughts
There’s something truly magical about how simple ingredients come together in the Mini No-Bake Peppermint Cheesecakes Recipe to create festive bites bursting with flavor and charm. Whether you’re hosting a holiday gathering or simply want to treat yourself, these cheesecakes are sure to become a cherished favorite. Don’t wait—gather your ingredients and enjoy making (and eating) these delightful peppermint treasures today!
Print
Mini No-Bake Peppermint Cheesecakes Recipe
- Prep Time: 30 minutes
- Cook Time: 10 minutes (for crust if baked); otherwise 1 minute microwave set time
- Total Time: 3 hours 30 minutes (includes chilling time)
- Yield: 12 mini cheesecakes
- Category: Dessert
- Method: No-Cook
- Cuisine: American
Description
Mini No-Bake Peppermint Cheesecakes are a festive and creamy dessert perfect for the holiday season. Featuring a buttery cookie crumb crust and a smooth peppermint-infused white chocolate cream cheese filling, these individual cheesecakes are easy to prepare without baking. Finished with a decorative red sugar topping, they offer a delightful blend of minty freshness and rich sweetness, making them a crowd-pleaser for parties or special occasions.
Ingredients
Crust
- 2 ½ cups cookie crumbs (shortbread, butter cookies, sugar cookies, animal crackers, or graham crackers)
- 4 tablespoons butter
Filling
- 2/3 cup cream
- 12 ounces white chocolate, chopped
- 4 (8-ounce) packages cream cheese, softened
- ½ cup butter, softened
- 2/3 cup powdered sugar
- 2 teaspoons vanilla extract
- 1 (10-ounce) bag Andes Peppermint Crunch candy pieces
- Red decorating sugar, for topping
Supplies
- Paper, pencil, scissors (for making stencil)
- Plastic wrap
- 12 silicone muffin liners (1 cup size)
Instructions
- Prepare the crust: Melt the 4 tablespoons of butter. Stir the melted butter into the 2 ½ cups of cookie crumbs until evenly combined. Press the mixture firmly and evenly into the bottoms of 12 silicone muffin cups to form the crust base.
- Set the crust: If using silicone muffin tins, microwave them for 1 minute to help set the crust. If using metal pans, bake the crusts in a 350°F oven for 10 minutes, then allow them to cool completely.
- Melt white chocolate mixture: In a microwave-safe bowl, heat 2/3 cup of cream with 12 ounces of chopped white chocolate on 50% power for 1 minute. Stir thoroughly to combine. If not fully melted, continue heating in 30-second increments, stirring after each, until the mixture is smooth and fully melted. Be careful not to overheat to avoid ruining the chocolate.
- Mix cream cheese and butter: Using an electric mixer at medium speed, beat together 4 packages of softened cream cheese and ½ cup softened butter until the mixture is well combined and creamy.
- Add sugar, vanilla, and chocolate mixture: Add 2/3 cup powdered sugar and 2 teaspoons vanilla extract to the cream cheese mixture. Slowly pour in the melted white chocolate mixture and beat on medium-high for about three minutes until the filling is completely smooth and fluffy.
- Incorporate peppermint candy: Gently fold in the 10-ounce bag of Andes Peppermint Crunch candy pieces until evenly distributed throughout the filling.
- Assemble cheesecakes: Spoon the peppermint white chocolate cream cheese filling into the prepared crusts in the muffin cups, smoothing the tops evenly.
- Chill: Refrigerate the cheesecakes for at least 3 hours or until firm. Alternatively, you can freeze them for about an hour to set faster.
- Create stencil for decoration: Cut a circular piece of paper the size of one muffin cup. Draw curved lines in a starburst or starlight mint pattern on the paper, stopping ½ inch from the center. Cut out the curved lines starting wider at the edges and tapering to points near the circle’s center to create the stencil shape.
- Decorate cheesecakes: Carefully pop the cheesecakes out of the silicone cups and place them on a cookie sheet to catch excess sugar. Place the paper stencil on top of each cheesecake and sprinkle red decorating sugar over the exposed areas to create a festive peppermint pattern.
- Wrap for serving: Tear off a 2-inch strip of plastic wrap and loosely wrap it around each cheesecake, twisting the ends and trimming any excess wrap. This helps keep them fresh and adds a decorative touch.
Notes
- Using silicone muffin liners makes it easier to remove the cheesecakes without damage.
- Be careful when melting the white chocolate; overheating can cause it to seize and ruin the texture.
- The cheesecake filling should be chilled thoroughly to ensure it sets properly and holds its shape.
- If you prefer a firmer texture, freeze the cheesecakes for an hour before serving.
- The red sugar decoration adds a festive touch but can be omitted if desired.
- These cheesecakes are best served chilled and consumed within 3 days for optimal freshness.
