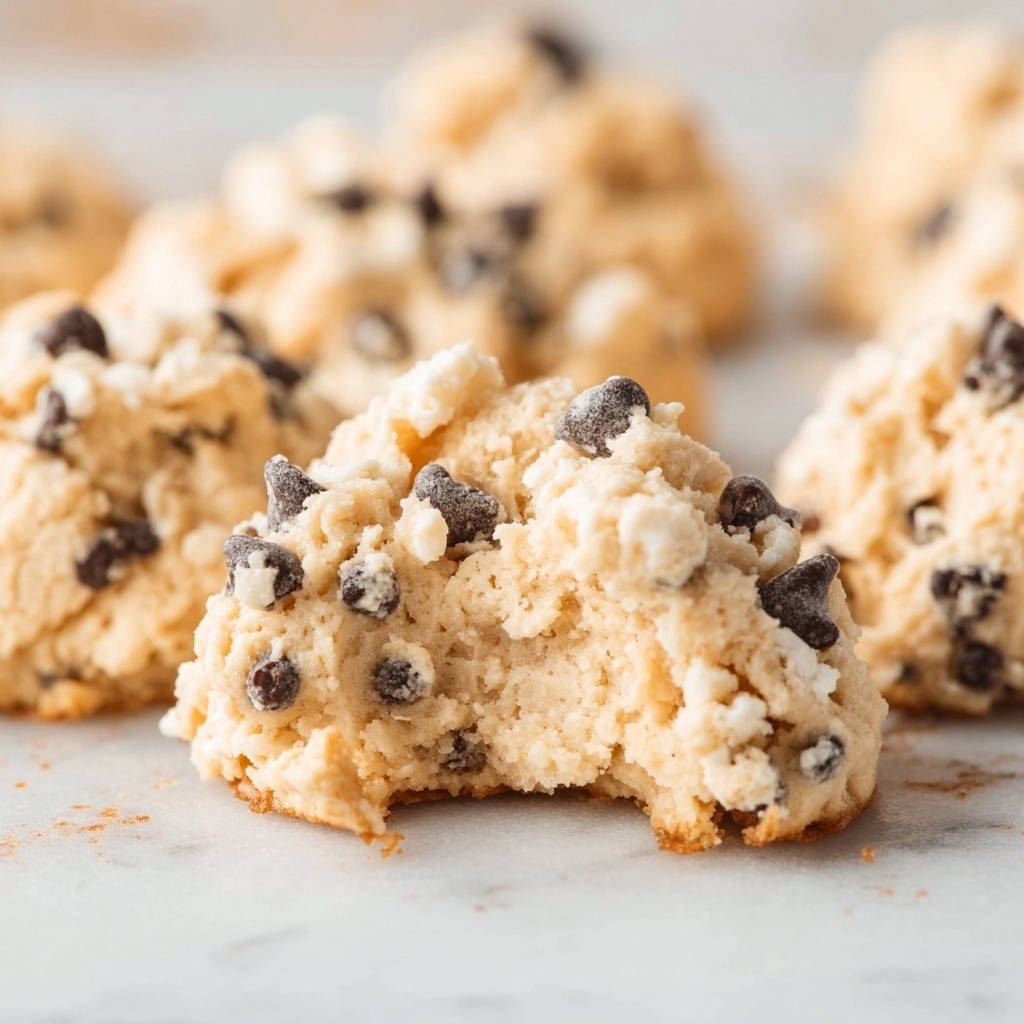
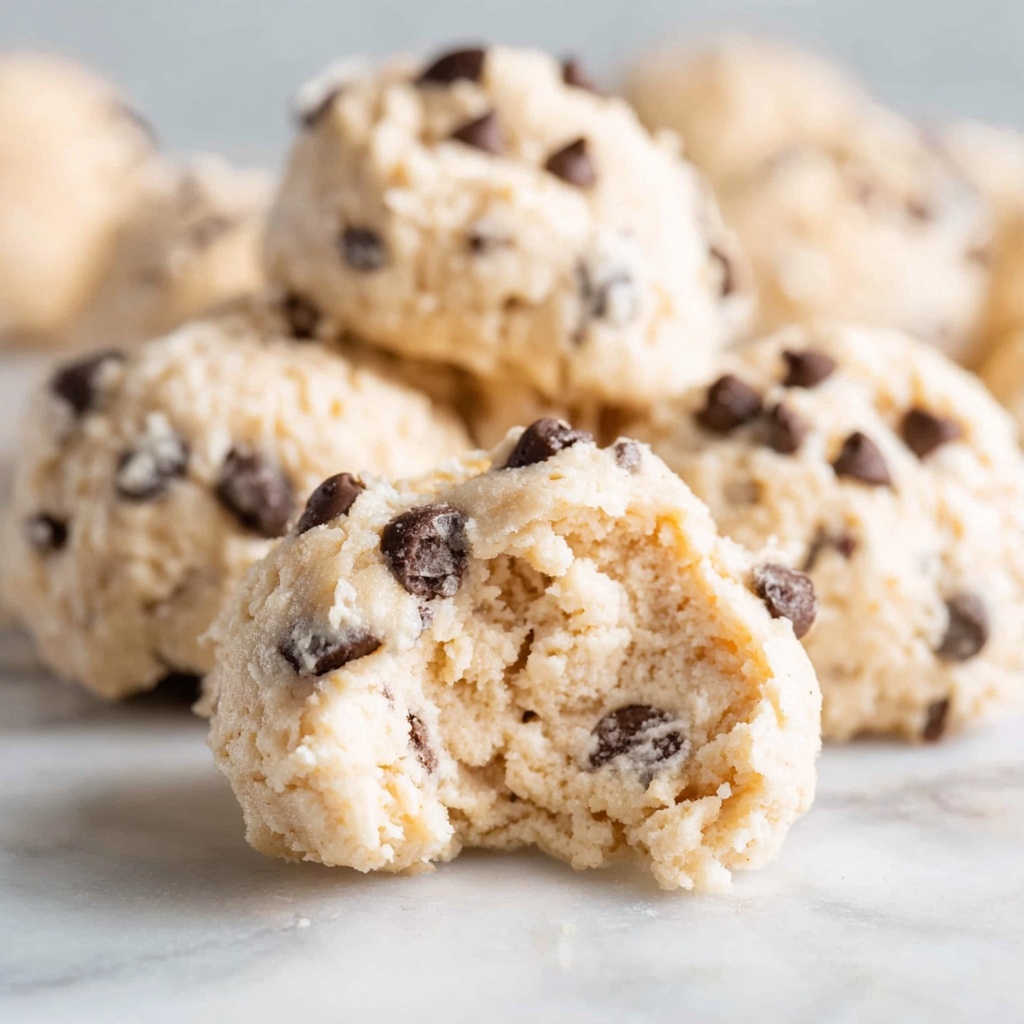
If you have a sweet tooth and a craving for something crunchy, creamy, and utterly irresistible, then this No Bake Avalanche Cookies Recipe is about to become your new best friend. These delightful clusters bring together crispy rice cereal, gooey white chocolate, and a touch of peanut butter magic, creating a treat that’s as easy to make as it is delicious. Perfect for a quick snack, a holiday party, or just a simple indulgence, these avalanche cookies are a no-fuss way to satisfy your dessert cravings without ever turning on the oven.
Ingredients You’ll Need
Gathering the right ingredients is the first step toward cookie bliss. Each one contributes its own unique flavor and texture, making these cookies a perfect harmony of sweet, crunchy, and creamy.
- Crispy Rice cereal: Provides the light, airy crunch that makes each bite so satisfying.
- Mini marshmallows: Adds soft, gooey pockets of sweetness throughout the cookies.
- Creamy peanut butter: Offers a rich, nutty undertone that perfectly balances the white chocolate.
- White chocolate (1 lb): The star ingredient that melts into a smooth coating, holding everything together with luscious sweetness.
- Mini chocolate chips (optional): Sprinkle on top for an extra pop of chocolate texture and flavor.
How to Make No Bake Avalanche Cookies Recipe
Step 1: Prepare Your Workspace
Start by lining two baking sheets with parchment paper. This simple step ensures your cookies won’t stick and makes clean-up a breeze. Having this ready before mixing everything keeps the process smooth and efficient.
Step 2: Combine the Dry Ingredients
In a large bowl, mix together the crispy rice cereal and mini marshmallows. The cereal provides that satisfying crunch, while the marshmallows add little pockets of sweetness that melt slightly to complement the smooth coating you’ll add later.
Step 3: Melt the White Chocolate and Peanut Butter
Using a double boiler is ideal for gently melting the white chocolate and creamy peanut butter together, achieving the perfect smooth blend without scorching. If you’re short on time, the microwave works too—just be sure to stir frequently to prevent burning. This luscious combination is what binds the cookie clusters and infuses them with rich flavor.
Step 4: Combine Everything
Pour the melted white chocolate and peanut butter mixture over the cereal and marshmallow blend. Stir carefully but thoroughly until every bit is coated with that creamy, sweet mixture. This step ensures each cookie has a perfect balance of crunch and creaminess.
Step 5: Form the Cookies
Using a tablespoon, drop portions of the mixture onto the parchment-lined baking sheets. Don’t worry about making them perfectly uniform—they should look delightfully rustic, just like an avalanche of flavor.
Step 6: Add Optional Toppings
Sprinkle mini chocolate chips on top while the clusters are still soft. This little extra touch adds bursts of chocolate and a bit of texture that really elevate the finished cookies.
Step 7: Chill Until Set
Refrigerate the baking sheets until the white chocolate hardens and the cookies firm up, usually about 15 minutes. Once set, they are ready to enjoy or package for gifting!
How to Serve No Bake Avalanche Cookies Recipe

Garnishes
For a charming presentation, consider dusting the tops with a sprinkle of powdered sugar or adding a drizzle of melted dark chocolate over the hardened cookies. These little touches bring a festive look and introduce a subtle flavor contrast that guests will love.
Side Dishes
This cookie pairs beautifully with a cold glass of milk or a warm cup of coffee or tea. The creamy, sweet, and crunchy texture shines even brighter alongside your favorite beverage, making snack time feel like a small celebration.
Creative Ways to Present
Turn these no bake treats into little gift packages by wrapping small batches in clear cellophane tied with ribbon. They also make colorful dessert buffet additions, where their snowball-like appearance adds fun and whimsy, perfect for both kids and adults!
Make Ahead and Storage
Storing Leftovers
Store any leftover No Bake Avalanche Cookies in an airtight container at room temperature for up to 5 days. This keeps them fresh, crunchy, and ready whenever a sweet craving strikes.
Freezing
If you want to make a big batch ahead of time, freeze the cookies by placing them in a sealed container separated by parchment paper layers. They can last up to a month in the freezer without losing their texture or flavor.
Reheating
Since these cookies don’t require baking, reheating is not necessary. If you prefer them slightly soft, just leave them at room temperature for 10–15 minutes before enjoying.
FAQs
Can I substitute the peanut butter with another nut butter?
Absolutely! Almond butter or cashew butter work nicely, offering a slightly different nutty flavor but the same creamy texture that binds the cookies.
What if I don’t have a double boiler?
No worries! You can melt the white chocolate and peanut butter in the microwave in short bursts, stirring well every 20 seconds to avoid overheating or burning.
Are these cookies gluten-free?
These No Bake Avalanche Cookies can be gluten-free if you use certified gluten-free crispy rice cereal. Always double-check the packaging to be sure.
Can I add other mix-ins to this recipe?
Definitely! Try tossing in chopped nuts, dried fruit, or even coconut flakes to customize flavor and texture to your liking.
How long do these cookies last if stored properly?
Stored in an airtight container at room temperature, they stay fresh and delicious for about 5 days, perfect for sharing or enjoying over the week.
Final Thoughts
I can’t recommend this No Bake Avalanche Cookies Recipe enough—it’s one of those simple pleasures that’s perfect for almost any occasion. The best part? You don’t need to turn on the oven, yet you get all the joy of a crunchy, sweet, and creamy homemade treat. Gather your ingredients, try the recipe, and get ready to fall in love with these delightful little clusters. Your taste buds will thank you!
Print
No Bake Avalanche Cookies Recipe
- Prep Time: 10 minutes
- Cook Time: 5 minutes
- Total Time: 15 minutes plus chilling time
- Yield: 24 servings
- Category: Dessert
- Method: No-Cook
- Cuisine: American
Description
No Bake Avalanche Cookies combine crispy rice cereal, mini marshmallows, creamy peanut butter, and smooth white chocolate to create delightful, bite-sized treats. These easy-to-make cookies require no baking and set in the refrigerator, making them perfect for quick snacks or parties.
Ingredients
Main Ingredients
- 2 cups Crispy Rice cereal
- 1 cup mini marshmallows
- 1/2 cup creamy peanut butter
- 1 lb white chocolate
Optional Topping
- 1/4 cup mini chocolate chips (to sprinkle on top)
Instructions
- Prepare Baking Sheets: Line 2 baking sheets with parchment paper and set them aside to ensure your cookies won’t stick during setting.
- Mix Dry Ingredients: In a large bowl, combine the crispy rice cereal and mini marshmallows, mixing them evenly. Set the mixture aside while you prepare the chocolate coating.
- Melt Chocolate and Peanut Butter: Using a double boiler, melt the white chocolate and creamy peanut butter together slowly, stirring frequently until the mixture is smooth and fully combined. Alternatively, you can melt them carefully in the microwave, stirring every 20 seconds to avoid burning.
- Combine Mixture: Pour the melted white chocolate and peanut butter mixture over the cereal and marshmallow blend. Stir well until every piece is completely coated with the chocolate mixture.
- Form Cookies: Using a tablespoon, drop scoops of the coated mixture onto the prepared baking sheets, spacing them evenly.
- Add Toppings: If desired, sprinkle mini chocolate chips on top of each cookie for extra flavor and texture.
- Chill to Set: Place the trays in the refrigerator and chill until the chocolate coating is firm and set, approximately 30 minutes.
Notes
- Using a double boiler helps melt white chocolate smoothly without burning.
- Microwave melting is a convenient alternative but requires careful monitoring.
- Mini chocolate chips on top add a decorative touch and extra chocolate flavor but are optional.
- Store cookies in an airtight container in the refrigerator to maintain freshness.
- These cookies are best enjoyed within 3-4 days.


