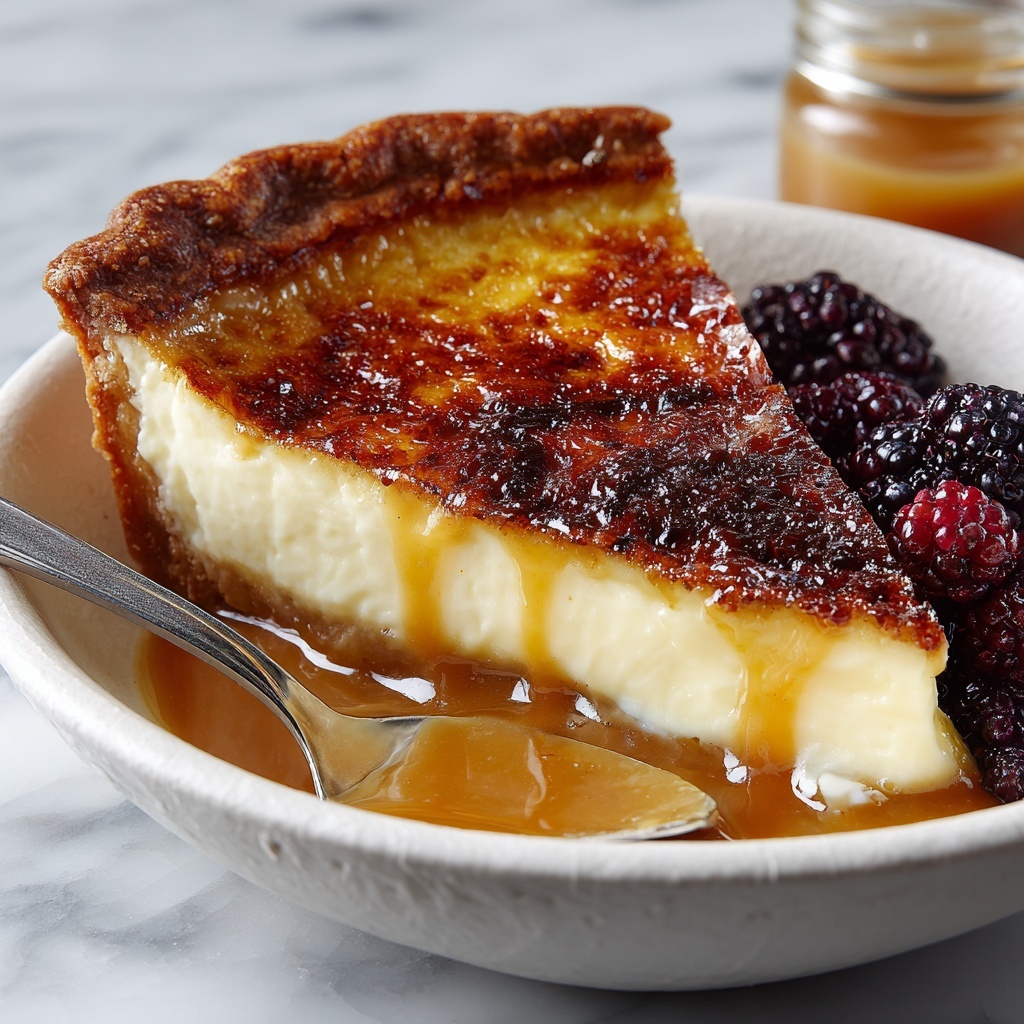
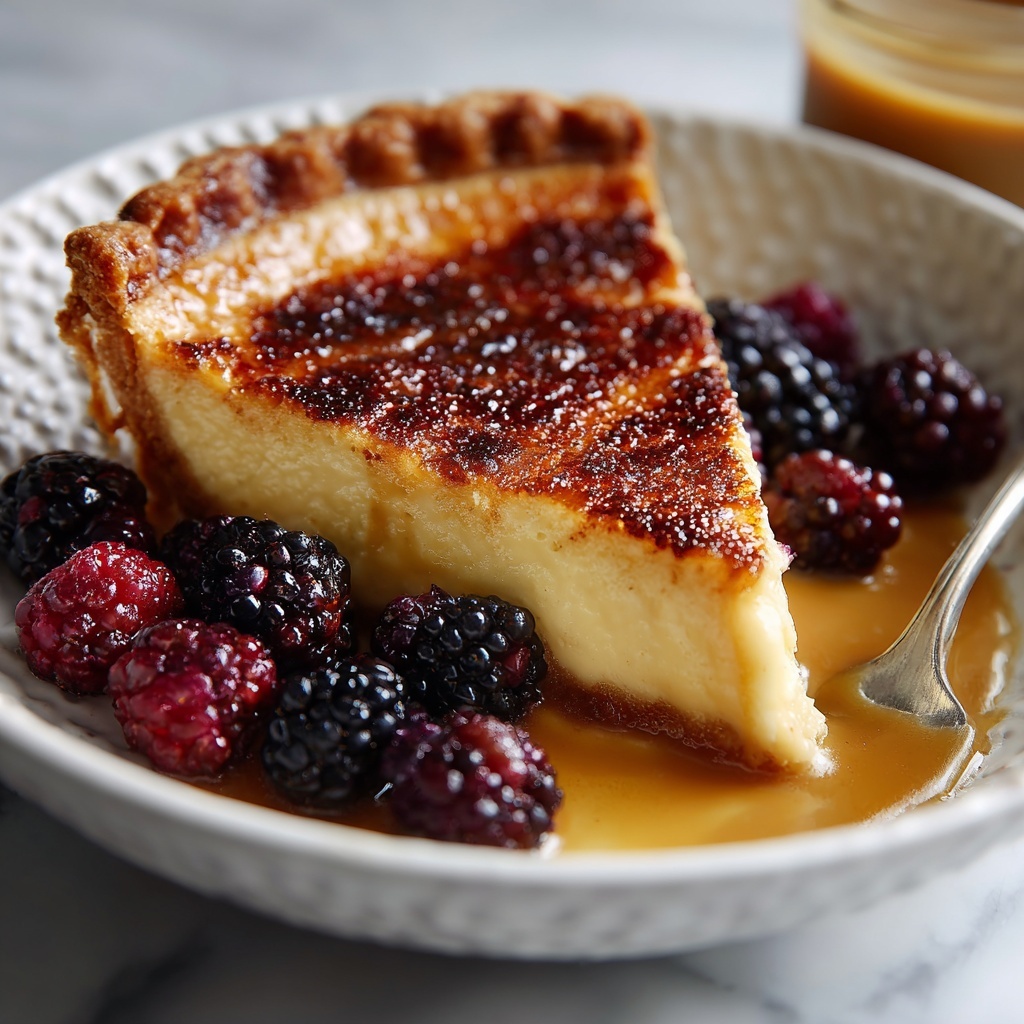
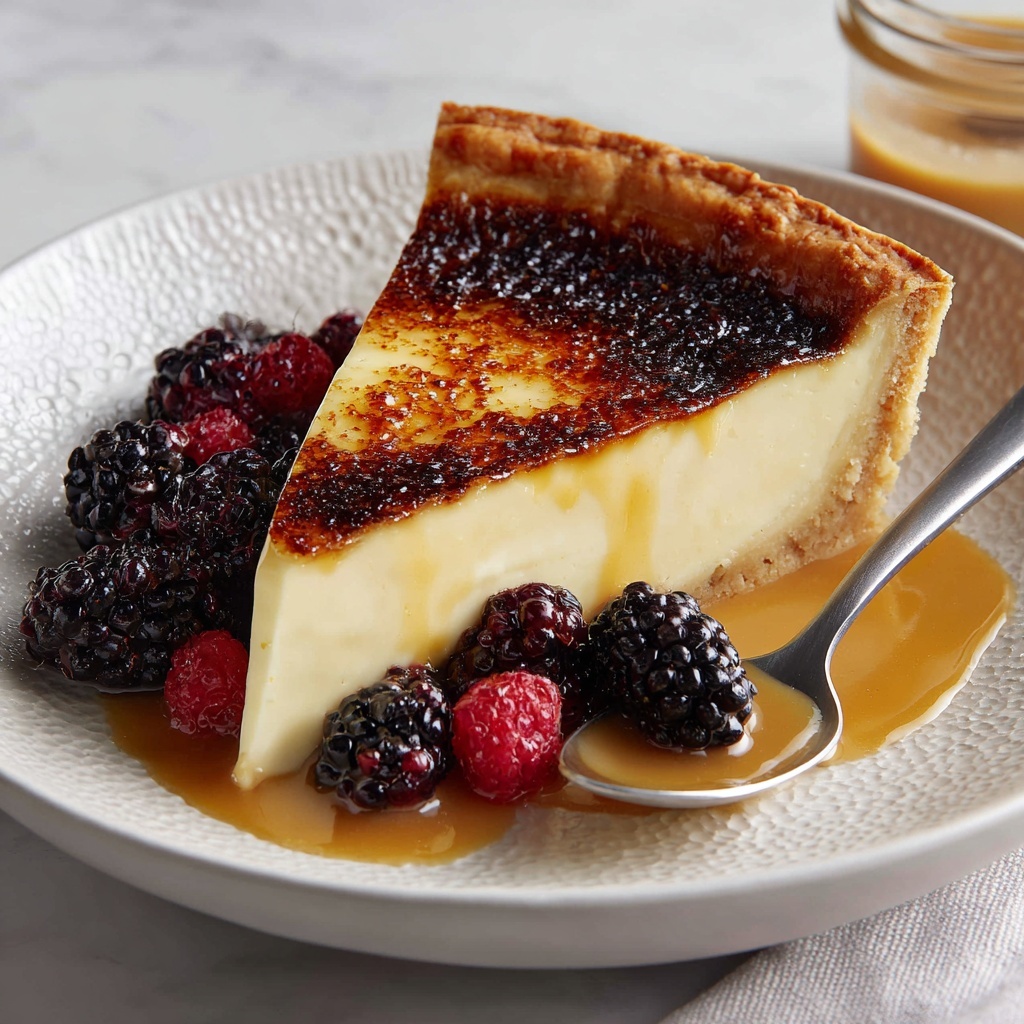
If you ever find yourself craving a dessert that feels like a luxurious hug in a ramekin, this Vanilla Bean Crème Brûlée Recipe is exactly what you need. The silky, rich custard infused with the fragrant warmth of real vanilla bean pairs perfectly with the satisfying crunch of caramelized sugar on top. This classic French dessert is not only stunningly simple to make but also irresistibly delightful to share with friends and family on any special occasion or just because. Trust me, once you experience the contrast of creamy custard beneath a crisp, burnt sugar crust, you’ll be hooked for life!
Ingredients You’ll Need
This Vanilla Bean Crème Brûlée Recipe relies on a handful of simple ingredients, each playing a crucial role in crafting that divine texture and flavor. Fresh cream lends richness, vanilla adds its signature aroma and sweetness, eggs build the custard’s smooth body, and sugar creates both the sweetness and that iconic crisp topping.
- 2 cups heavy cream: Provides the creamy, luscious base that makes this dessert feel indulgent.
- 1 whole vanilla bean (or 2 teaspoons pure vanilla extract): Real vanilla bean seeds give an unparalleled fragrance and speckled look, but extract works perfectly too.
- 5 large egg yolks: These create the custard’s thick, custardy texture with their richness and binding power.
- ½ cup granulated sugar: Sweetens and helps thicken the custard for a balanced flavor.
- ¼ cup granulated sugar (for topping): This sugar forms the caramelized, crunchy crust that is the pièce de résistance.
How to Make Vanilla Bean Crème Brûlée Recipe
Step 1: Infuse the Cream with Vanilla
Start by heating the heavy cream with the seeds scraped from your vanilla bean and the pod itself over medium heat until it’s just about to simmer. This gentle infusion extracts the rich vanilla flavor, creating the fragrant soul of your custard. If you’re using extract, add it later to avoid losing any aroma in the heat. Let this mixture steep off the heat for 10 to 15 minutes to deepen the flavor even more.
Step 2: Whisk Egg Yolks and Sugar
While your cream is steeping, whisk together the egg yolks and ½ cup granulated sugar until the mixture becomes pale and slightly thickened. This ensures your custard will have that perfect balance of sweetness and silkiness that melts on your tongue.
Step 3: Temper the Eggs
Remove the vanilla pod from the cream, then slowly pour the warm cream into the egg mixture while whisking constantly. This step is crucial to temper the eggs, preventing them from scrambling and ensuring a smooth custard. Taking your time here makes all the difference.
Step 4: Strain and Pour
Strain the rich custard through a fine mesh sieve to catch any solids and achieve an ultra-smooth texture. Pour this luscious mixture evenly into ramekins, which will help portion and bake your crème brûlée to perfection.
Step 5: Prepare the Water Bath and Bake
Place your ramekins in a deep baking dish, then carefully pour in hot water until it comes halfway up the sides. This water bath provides gentle, even heat cooking so the custard sets just right without curdling. Bake at 325°F (160°C) for 35 to 40 minutes until the centers are set but still slightly jiggly—a telltale sign it’s ready.
Step 6: Cool and Chill
Remove the ramekins from the water bath and let them cool to room temperature for about 30 minutes. Then refrigerate for at least two hours, or up to two days. This chilling step lets the custard firm up and the flavors meld beautifully.
Step 7: Caramelize the Sugar Topping
When you’re ready to serve, evenly sprinkle about one teaspoon of granulated sugar atop each custard, then use a kitchen torch to caramelize the sugar until it forms a crisp, golden-brown crust. If a torch isn’t handy, a quick session under the broiler will also do the trick — just watch carefully to avoid burning. Let the caramel harden for a couple of minutes before digging in.
How to Serve Vanilla Bean Crème Brûlée Recipe
Garnishes
A simple twist like a few fresh berries or a sprig of mint can brighten the richness of this dessert without overpowering it. Thin slices of toasted almonds add a subtle crunch, while a light dusting of powdered sugar can create a pretty presentation contrast.
Side Dishes
This Vanilla Bean Crème Brûlée Recipe is a showstopper all on its own, but pairing it with a dollop of whipped cream or a small scoop of vanilla bean ice cream can turn it into a luxurious dessert experience. For a fruity counterpoint, serve alongside fresh raspberries or a citrus compote to add a pop of color and tang.
Creative Ways to Present
For a fun twist, try serving your crème brûlée in mini mason jars or vintage tea cups for a charming rustic look. You can also sprinkle crushed pistachios or edible gold flakes on top for an elegant celebration-worthy presentation that will wow your guests.
Make Ahead and Storage
Storing Leftovers
You can store any leftover crème brûlée in the refrigerator uncovered for up to two days. Keep the caramel crust separate and re-caramelize just before serving to maintain that signature crisp texture.
Freezing
Freezing isn’t ideal for crème brûlée because it can affect the custard’s texture, causing it to become a bit grainy. If you must freeze, do so before caramelizing the sugar and thaw it gently in the refrigerator overnight before preparing the topping.
Reheating
This dessert is best enjoyed chilled, so avoid reheating. If you want to refresh the caramel crunch after refrigeration, simply use your kitchen torch again to melt and harden the sugar topping just before serving.
FAQs
Can I use vanilla extract instead of a vanilla bean?
Absolutely! While fresh vanilla beans provide a more intense aroma and those lovely black specks, pure vanilla extract works perfectly well and is a fantastic substitute when beans are unavailable.
What if I don’t have a kitchen torch?
Not a problem. You can place your sugared ramekins under a broiler for 1 to 2 minutes, watching carefully to prevent burning. This method still gives you that crisp, caramelized top.
Can I make this Vanilla Bean Crème Brûlée Recipe dairy-free?
Traditional crème brûlée relies on heavy cream for its texture, so substituting will change the outcome. Coconut cream can work as a dairy-free alternative but expect a different flavor and slightly different texture.
How do I know when the custard is perfectly cooked?
The custard should be mostly set but slightly jiggly in the center when you gently shake the ramekins. It will firm up more as it chills in the fridge. Overcooking causes a grainy texture, so it’s best to keep an eye on it.
Can I prepare this recipe in advance?
Definitely! In fact, letting the custard chill for several hours or overnight enhances the flavor and texture. Just apply the sugar topping and caramelize right before serving for the best experience.
Final Thoughts
This Vanilla Bean Crème Brûlée Recipe is one of those timeless desserts that never fails to impress. It’s elegant yet straightforward, making it perfect for both beginner cooks and seasoned bakers looking to delight guests. Give it a try and savor the magic of that smooth, creamy custard paired with a crackling caramel top—you won’t regret it!
Print
Vanilla Bean Crème Brûlée Recipe
- Prep Time: 15 minutes
- Cook Time: 40 minutes
- Total Time: 2 hours 55 minutes
- Yield: 4–6 servings
- Category: Dessert
- Method: Baking
- Cuisine: French
- Diet: Gluten Free, Vegetarian
Description
This classic Vanilla Bean Crème Brûlée offers a rich and creamy custard infused with real vanilla bean, topped with a perfectly caramelized sugar crust. Smooth and velvety, it’s an elegant French dessert that impresses with its contrast of textures and delicate flavors, ideal for special occasions or a luxurious treat.
Ingredients
Custard
- 2 cups heavy cream
- 1 whole vanilla bean (or 2 teaspoons pure vanilla extract)
- 5 large egg yolks
- ½ cup granulated sugar
Topping
- ¼ cup granulated sugar (for topping)
Instructions
- Preheat the oven: Set your oven to 325°F (160°C) to ensure it reaches the perfect temperature for gentle baking.
- Infuse the cream: In a medium saucepan over medium heat, combine the heavy cream with the scraped seeds of the vanilla bean and add the whole vanilla pod as well. Heat the mixture just until it is about to simmer, then remove from heat and let it steep for 10 to 15 minutes to fully develop the vanilla flavor.
- Prepare the egg mixture: While the cream is steeping, whisk together the egg yolks and ½ cup granulated sugar in a mixing bowl until the mixture is pale and slightly thickened, ensuring a smooth custard base.
- Temper the eggs: Remove the vanilla pod from the cream. Slowly add the warm cream into the egg mixture a little at a time, whisking continuously to prevent the eggs from cooking prematurely.
- Strain the custard: Pour the combined mixture through a fine mesh sieve into a large bowl or measuring cup to remove any cooked egg bits or solids, resulting in a silky texture.
- Prepare for baking: Divide the custard evenly among 4 to 6 ramekins. Place the ramekins inside a deep baking dish, then carefully pour hot water into the dish until it reaches halfway up the sides of the ramekins, creating a water bath for gentle, even cooking.
- Bake: Bake the custards for 35 to 40 minutes, until the centers are just set but still slightly jiggly, indicating a perfectly creamy texture.
- Cool and chill: Remove the ramekins from the water bath and allow them to cool to room temperature for 30 minutes. Afterwards, refrigerate for at least 2 hours or up to 2 days to let the custards fully set and flavors meld.
- Caramelize the topping: When ready to serve, sprinkle about 1 teaspoon of granulated sugar evenly over each custard. Using a kitchen torch, carefully melt and caramelize the sugar until it forms a golden, crisp crust. Alternatively, place the sugared ramekins under a broiler for 1 to 2 minutes, watching carefully to avoid burning.
- Serve: Let the caramelized sugar crust sit for 1 to 2 minutes to harden, then serve and enjoy this beautifully textured dessert.
Notes
- If you don’t have a kitchen torch, you can caramelize the sugar under a broiler for 1–2 minutes; watch closely to prevent burning.
- For an extra layer of flavor, try infusing the cream with a strip of citrus zest or a splash of your favorite liqueur while it steeps.
- This dessert can be prepared a day in advance and kept refrigerated until ready to caramelize and serve.


